What AI Prompt Assistant is
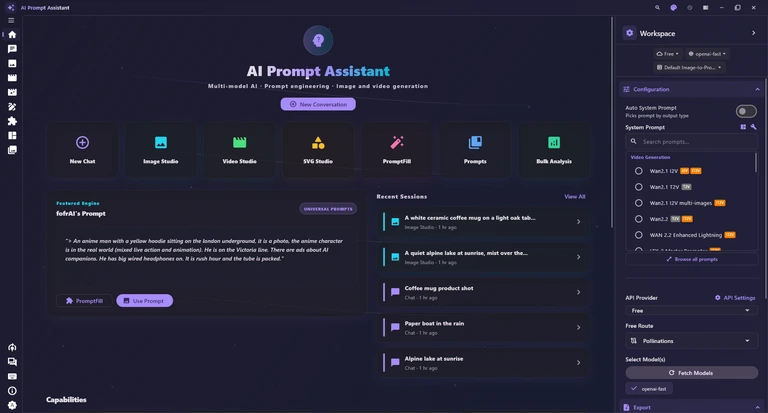
AI Prompt Assistant is a Windows app that brings many AI models into one window. Chat with them, turn images and videos into prompts, generate images and videos, break a video into a storyboard, draw SVG art, fill prompt templates, browse prompt libraries and analyse whole folders of images.
Chat and image-to-prompt
Talk to one model or several at once, each answering in turn. Attach a picture and the model writes a prompt that describes or recreates it; Bulk Analysis does the same for a whole folder. See Chat.
Image and Video Studio
Type a prompt, or start from a reference picture, and generate images and videos. Images work on the Free provider; videos need a key from a video provider. See Image Studio and Video Studio.
Storyboard
Drop in a finished video: the app finds the cuts, describes each shot and lays the shots out as a storyboard sheet you can export. See Storyboard.
SVG Studio
Describe an icon or an illustration and the AI draws it as SVG vector art, still or animated, ready to copy or download. See SVG Studio.
Prompt tools
PromptFill fills prompt templates from word banks, Prompts browses public community libraries, Prompt Director builds a prompt from menus, and system prompts shape how the AI answers.
Your choice of AI
Start on the built-in Free provider, add your own API keys for providers such as Google or OpenAI, or run models on your own PC. See Providers and models and local models.
You need no account and no API key. The built-in Free provider handles chat and prompt writing and makes images in Image Studio. Add a key later only for the features that need one (which features need a key).
On-screen labels are in bold, keys look like CtrlK, and folders and typed values look like Documents\ai_prompt_assistant. Blue links jump to the chapter that explains a feature in detail. Click a screenshot to enlarge it.
Install
Download AI Prompt Assistant from the AI Prompt Assistant page on pixeoai.com. The download is a normal Windows installer: run it, follow the steps, and it adds shortcuts to your Desktop and Start menu.
Install step by step
- Download the installer from the AI Prompt Assistant page on pixeoai.com.
- Open the downloaded file. If Windows shows a blue warning, see If Windows shows a security warning.
- Follow the installer's steps until it finishes.
- Start the app from its Desktop or Start-menu shortcut, usually named PixeoAi APA.
If Windows shows a security warning
Windows SmartScreen warns about programs it has not seen often, and a new publisher is enough to trigger it. You may see a blue Windows protected your PC message instead of the installer. To continue:
- Click More info under the message.
- Check that the app name shown is the installer you just downloaded.
- Click Run anyway and continue the installation.
Do this only for an installer you downloaded yourself from pixeoai.com. If the file came from anywhere else, do not run it: delete it and download a fresh copy from the AI Prompt Assistant page on pixeoai.com.
What you need
- Windows 10 or 11, 64-bit.
- An internet connection for online AI providers (including the Free provider), the Prompts libraries and update checks.
- Running AI models on your own computer (Local Enhancer, Ollama and others) needs a capable PC, usually with a strong graphics card.
What goes where
The program itself installs like any other Windows app. Your chats, settings and other work are kept separately in Documents\ai_prompt_assistant, inside your Documents folder. Where your files are kept lists what is inside.
Uninstalling
Open Windows Settings › Apps › Installed apps, find the app (usually listed as PixeoAi APA) and choose Uninstall. Uninstalling leaves the Documents\ai_prompt_assistant folder in place, and that folder also holds your saved API keys. To remove everything, delete the folder yourself afterwards.
First start
A short splash screen appears, then the window opens full-size on the Home tab. There is no setup wizard: the app starts on the built-in Free provider, with its Free Route set to Pollinations. No model is selected yet, so sending a message before you pick one shows Please select at least one model. Auto System Prompt is on with Video output, so your requests are shaped into video prompts until you change it (Auto System Prompt).
Your first chat in five steps
- Open Chat: press Ctrl2 or click the chat icon in the navigation pane.
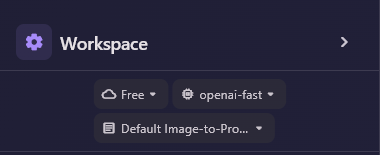
- In the Workspace sidebar on the right, check that the Provider chip shows Free. If not, click it and choose Free.
- Click the Model chip and tick a model in the Models dialog, then click Done. The list loads by itself; Fetch Models in the sidebar reloads it.
- Type a message in Type a message... and press CtrlEnter or click the send arrow.
- The answer appears under your message. The chat is saved automatically and shows up in the History panel.
With Free you can chat and write prompts, and make images in Image Studio with its Flux models. It cannot make videos, and reading attached images is unreliable (the default route could not in our tests); for those, see which features need a key. Free relies on shared public services, so it can be slow or busy at times: wait a moment and try again, or try another Free Route.
Where next: learn the layout in The window at a glance, explore Chat in depth, make a picture in Image Studio, or add your own key or a local model in Providers and models.
The window at a glance
Every tab shares the same frame: the title bar across the top, the navigation pane down the left edge, the History panel beside it on Chat, Image Studio and Video Studio, the work area in the middle and the Workspace sidebar on the right. This chapter explains each part.
The title bar
The title bar shows the app name; drag it to move the window. Its buttons show only icons, so hover over one to see its name. The table below uses those names.

| Item | What it does |
|---|---|
| Search everything | Opens the command palette to find a chat or session by its title (CtrlK). See Search everything. |
| Choose theme | Opens the list of ten colour palettes. See Appearance. |
| Hide history / Show history | Hides or shows the History panel on Chat, Image Studio and Video Studio (CtrlH). On a narrow window it reads Open history and slides the panel out as a drawer. |
| Hide sidebar / Show sidebar | Collapses the Workspace sidebar to a thin rail, or expands it again (CtrlB). On a narrow window it reads Open sidebar. |
| Minimize | Shrinks the window to the taskbar. |
| Maximize / Restore | Fills the screen, or returns the window to its previous size. |
| Close | Closes the app. If a local model is loaded, the app unloads it first, which frees your graphics card's memory. |
The navigation pane
The navigation pane on the left edge opens the nine tabs: Home, Chat, Image Studio, Video Studio, Storyboard, SVG Studio, PromptFill, Prompts and Bulk Analysis. A small bar beside an icon marks the tab you are on.
The pane starts as a narrow strip of icons. Click the hamburger button (three lines) at the top to show the names beside the icons, and click it again to fold it back.
Ctrl1 to Ctrl9 jump straight to the tabs in that order. Only the tab you have open keeps its unsaved on-screen state, so finish or copy what you are typing before you switch. Saved chats and studio sessions stay safe in History.


The footer items
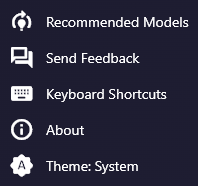
Five items sit at the bottom of the pane: the first four open dialogs instead of tabs, and the last one switches between the system, light and dark modes.
| Item | What it does |
|---|---|
| Recommended Models | Opens Recommended Vision Models: models that can read images, to download with LM Studio or Ollama, plus Google Gemini models. See Recommended models. |
| Send Feedback | Opens the Send feedback form for a message, a rating or a bug report to the developer. See Feedback. |
| Keyboard Shortcuts | Opens the list of shortcuts (Ctrl/ or F1) with the Send message with Enter switch. See Keyboard shortcuts. |
| About | Shows the version and links to App Page, More Free Apps and Contact Us. See About. |
| Theme: System / Light / Dark | Each click moves to the next mode: Theme: System, Theme: Light, Theme: Dark. See Appearance. |
Search everything
Press CtrlK or click the magnifier in the title bar to open Search everything. It finds your chats and your Image Studio and Video Studio sessions by title, from any tab. It does not search message text or prompts; for words inside a chat, use the History search. With an empty box it lists your 15 most recent items, and opening one switches to its tab.
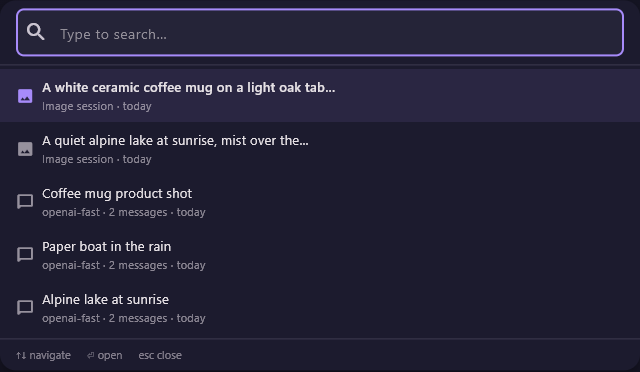
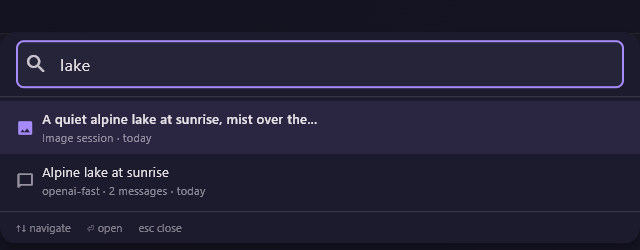
Use ↑ and ↓ to move through the list, Enter to open the highlighted item and Esc to close the palette.
The History panel
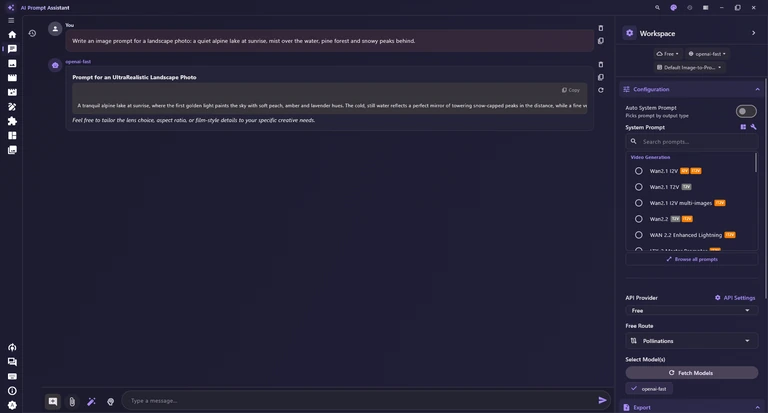
The History panel on the left of Chat, Image Studio and Video Studio lists your saved chats or sessions; each of these tabs has its own list and folders. At the top are New Chat (New Session in the studios), a new-folder button and a search box. In Chat, the ▼ beside New Chat offers Keep Uploads, which starts a new chat with your last attachments (Chat).
Chats save themselves after each reply. In the Recent view they are grouped by date: Pinned, Today, Yesterday, Previous 7 days, Previous 30 days and Older.
Press CtrlH, click the chevron at the top of the panel or use the title-bar button to hide or show it. The panel appears only when the window is wide enough (about 1400 pixels); a narrower window shows a slim rail with Show history (Ctrl+H) instead, and below about 1200 pixels the history and the sidebar become drawers that slide out. Drag the panel's edge to change its width; the app remembers it.

Views and row size
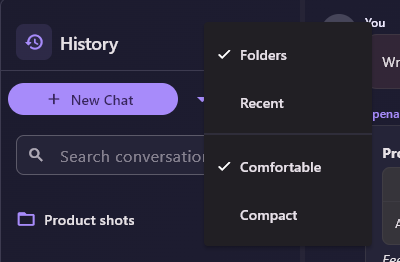
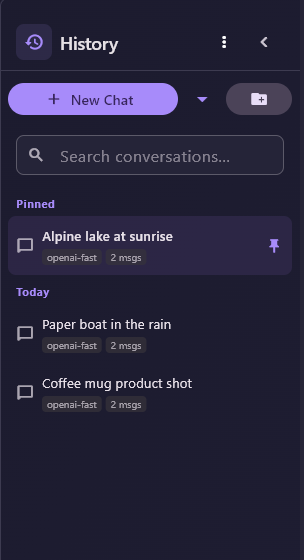
| Item | What it does |
|---|---|
| Folders | The default view. Shows your folders and subfolders with their items, and the row buttons for pinning, renaming, moving and deleting. Drag items to sort them. |
| Recent | A flat list grouped by date, newest first. Chat rows show the model and the message count. Each row offers only the pin; rename and move are in the Folders view. |
| Comfortable | Roomier rows that are easier to read and click. |
| Compact | Tighter rows, so more items fit on screen. |
In the Recent view you can act on several items at once. Hold Ctrl and click to add or remove a row, or hold Shift and click to select a range; while a selection is active, a plain click also adds or removes. A bar shows how many are selected, with Pin selected, Delete selected (which asks first) and Clear selection. There is no bulk move or rename.
Searching the history
Type in the search box (Search conversations... in Chat) to filter the list; the panel switches to the Recent view while you search. In Chat the search matches titles and the text of messages, and shows a snippet with the match highlighted. In the studios it matches titles. Click the X in the box to clear it.
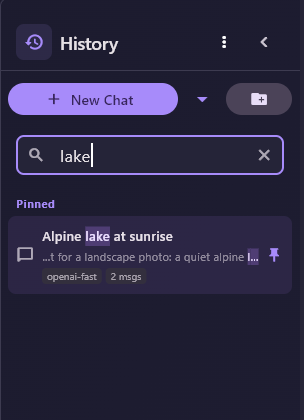
Row buttons
In the Folders view, hover a chat or session to show four buttons at the end of its row. In the studios the dialogs say Session instead of Conversation, for example Rename Session.
| Item | What it does |
|---|---|
| Pin / Unpin | Pins the item so it heads the Pinned group of the Recent view. Click again to unpin it. |
| Rename | Opens Rename Conversation: type a new Title and click Save. |
| Move to folder | Opens Move Conversation: choose Root (No Folder) or a folder, then click Move. |
| Delete | Asks Are you sure you want to delete followed by the title. Delete removes the item; Cancel keeps it. |
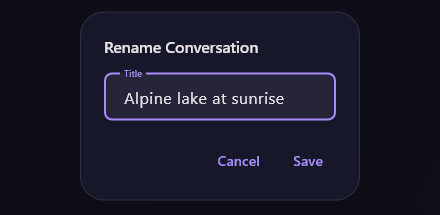
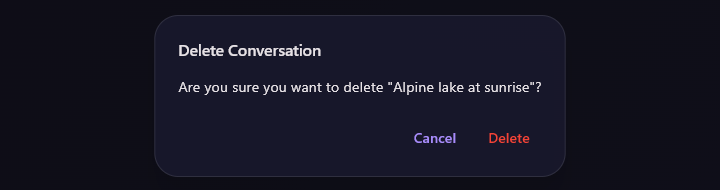
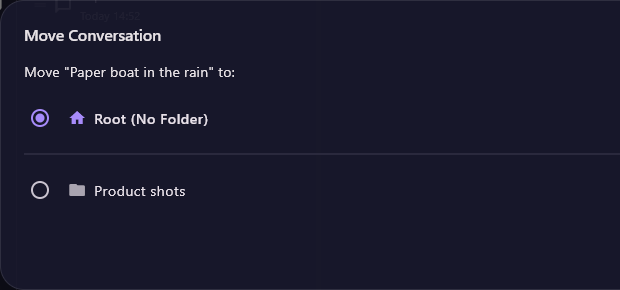
The Move Conversation dialog stretches across the whole window, so its Cancel and Move buttons sit at the far right, a long way from the list. Pick the destination, then look to the right edge for Move.
Folders
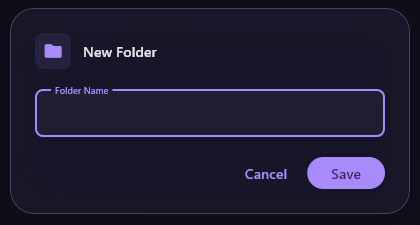
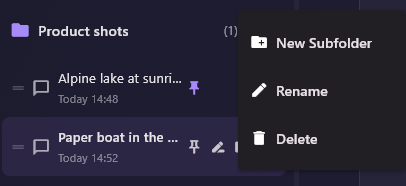
Folders keep related chats or sessions together. Click the new-folder button beside New Chat (or New Session), type a Folder Name in New Folder and click Save. Each folder row has a ⋮ menu. You can also drag an item onto a folder to file it, onto Move to root to take it out again, or up and down to reorder; reordering is off while you search.
| Item | What it does |
|---|---|
| New Subfolder | Creates a folder inside this one. |
| Rename | Gives the folder a new name. |
| Delete | Asks what to do with the contents: Keep contents moves the items to the top level, Delete everything deletes the folder and all the items in it. |
The Workspace sidebar
The Workspace sidebar on the right of every tab holds the AI settings: which provider, which model and which system prompt. Three chips at the top show your current choices; click one to change it.
| Item | What it does |
|---|---|
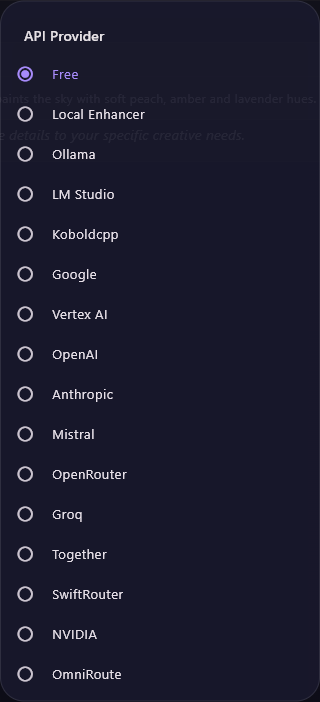
| Provider chip | Shows the active provider. Click it for a short API Provider list of the providers you have made visible (API Settings). |
| Model chip | Shows the first selected model, with +N when more are selected, or No model. Click it to open the Models dialog: search, tick one or more models, refresh the list and click Done. See Choosing a model. |
| System prompt chip | Shows Auto while Auto System Prompt is on, otherwise the name of the current system prompt. Click it for a searchable System Prompt list. See System prompts. |
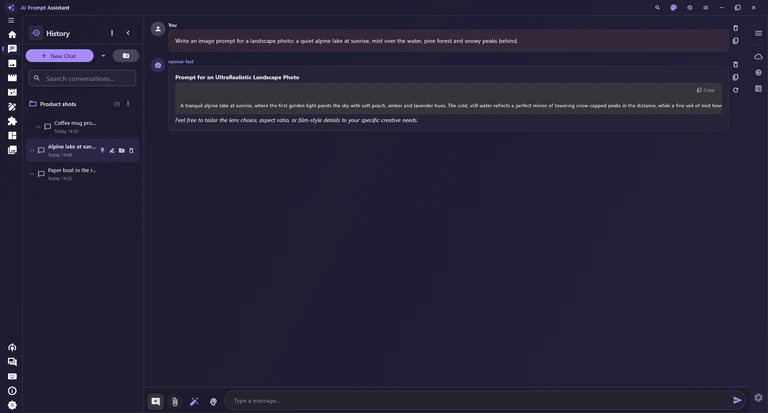
Press CtrlB, click the chevron at the top of the sidebar or use the title-bar button to collapse it to a thin rail. The rail keeps an Expand sidebar button at the top, quick buttons for the provider, the model and the system prompt, which open the same pickers as the chips, and a gear at the bottom that also expands the sidebar.
Below Configuration, the sidebar has Export, which appears only while a chat has messages (Export), and Data Management (Deleting data). At the very bottom are Website and GitHub links and the version number.

Configuration
The Configuration section, under the chips, holds every AI setting in full. Changes take effect at once, and the app remembers them.
The system prompt settings come first, then the provider and the models. Some controls appear only when they apply: the Image / Video toggle while Auto System Prompt is on, and Free Route while Free is the provider.
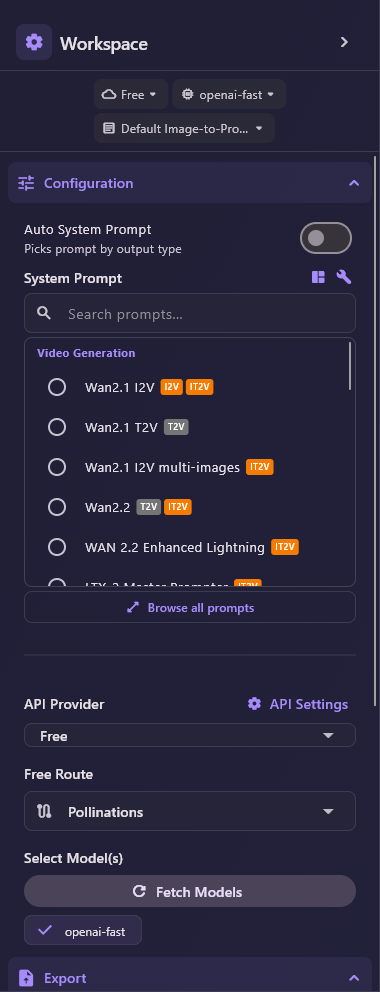
| Item | What it does |
|---|---|
| Auto System Prompt | When on, the app picks a suitable system prompt for you from what you attach and the output you want. See Auto System Prompt. |
| Image / Video | Shown only while Auto System Prompt is on: the kind of prompt you want, one for an image or one for a video. The Co-Creator uses it too. |
| System Prompt | The list of system prompts, grouped by category, with coloured badges for what each one takes and makes. Greyed out while Auto System Prompt is on. See System prompts. |
| Browse all system prompts | The mosaic icon beside the heading. Opens the System Prompt Browser. |
| Open Prompt Builder | The wrench icon. Opens the System Prompt Builder to make your own system prompt. |
| Search prompts... | Filters the list as you type. |
| Browse all prompts | The button under the list. Opens the same System Prompt Browser. |
| API Provider | Chooses the provider for Chat and the other AI features. See Providers and models. |
| API Settings | Opens API Provider Settings, where you enter keys and addresses and choose which providers the sidebar lists. See API Settings. |
| Free Route | Shown only with Free: which free service answers, Pollinations by default. Choosing Ollama here does not use Ollama on your PC. See The Free provider. |
| Select Model(s) | Click model chips to tick one or more; ticked models move to the top, and the choice is remembered for each provider. A search box appears when there are more than 8 models. See Choosing a model. |
| Fetch Models | Asks the provider for its current list of models (Fetching... while it works). If the connection fails, the app shows steps to fix it. See Troubleshooting. |
Home
Home is the tab the app opens on. It gathers shortcuts to every studio, a featured prompt, your latest sessions and a row of ready-made examples. Come back to it any time with the house icon at the top of the navigation pane or with Ctrl1.
The banner at the top has an animated background. New Conversation opens a new, empty chat and switches to the Chat tab.
Quick-start tiles

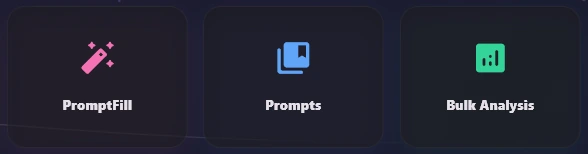
Each tile opens its tab. New Chat starts a blank chat, just like New Conversation; the others open Image Studio, Video Studio, SVG Studio, PromptFill, Prompts and Bulk Analysis. Storyboard has no tile: open it from the navigation pane or with Ctrl5.
Featured Engine
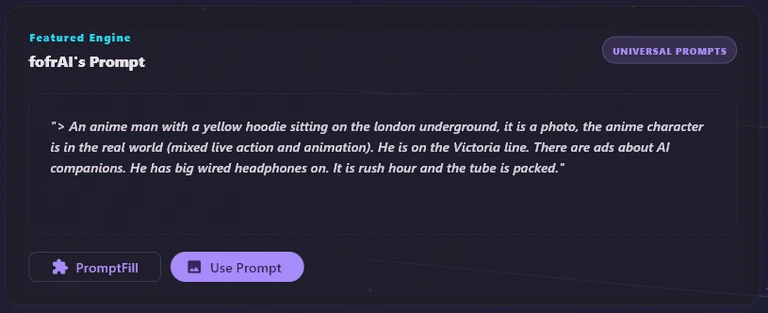
- PromptFill loads the prompt (and its preview image, if it has one) into PromptFill, where you can turn it into a reusable template. The app confirms with Prompt sent to PromptFill.
- Use Prompt puts the prompt text into the prompt box of Image Studio and opens it. For a video prompt the button reads Create Video and opens Video Studio instead. Only the text is sent, and nothing is generated until you start it yourself.
Recent Sessions
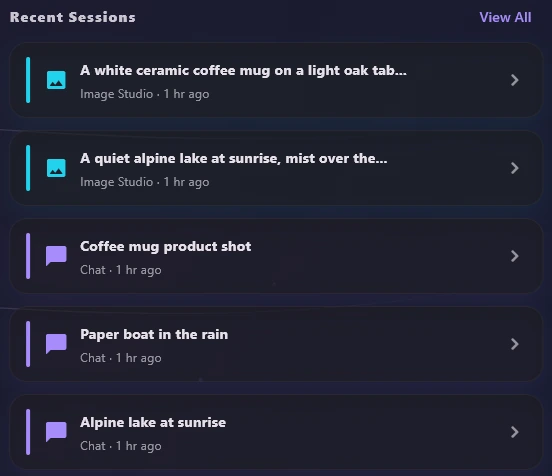
Recent Sessions lists up to five of your latest chats, Image Studio sessions and Video Studio sessions, with their kind and age, for example Chat · 1 hr ago. Click one to reopen it in its tab. Until you have any, the list reads Your recent conversations and generation sessions will appear here.
View All simply opens the Chat tab; there is no separate page listing everything. To browse, search and organise all your sessions, use the History panel or the command palette (CtrlK).
Capabilities
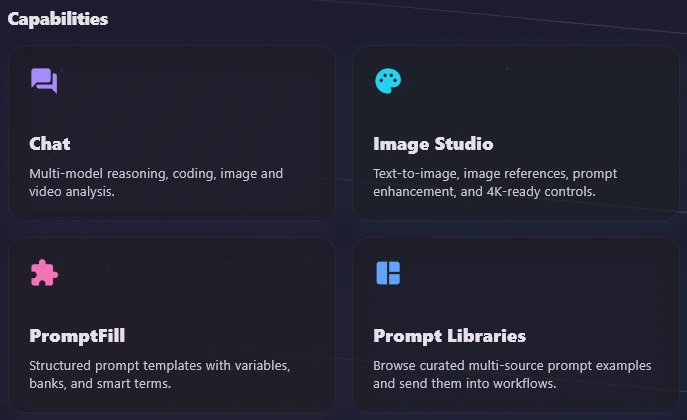
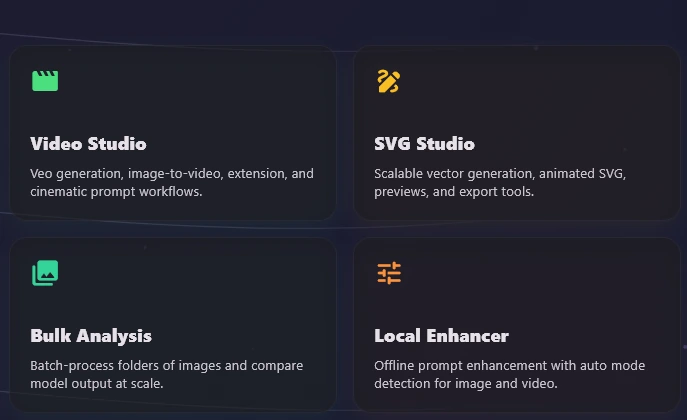
The eight Capabilities cards sum up what the app can do, and each one is also a button. Chat, Image Studio, Video Studio, SVG Studio, PromptFill and Bulk Analysis open their tabs, and Prompt Libraries opens Prompts. Local Enhancer has no screen of its own: its card opens Chat, where you use it by choosing it as the provider (see Local Enhancer).
Creative Examples
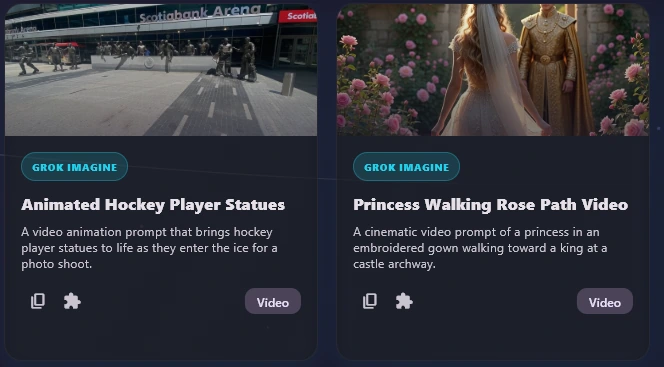
Creative Examples is a row of up to ten example cards that scrolls sideways. They come from the online prompt libraries and the built-in Universal collection; if none can be loaded, three built-in samples appear. Each card shows a picture, the library badge, a title and a short description.
| Item | What it does |
|---|---|
| Shuffle | Puts the examples in a new random order and also picks a new prompt for Featured Engine. |
| Copy prompt (copy icon) | Copies the card's prompt text. The app confirms with Prompt copied to clipboard. |
| Send to PromptFill (puzzle icon) | Sends the prompt to PromptFill, just like the PromptFill button of Featured Engine. |
| Use / Video | Puts the prompt text into Image Studio and opens it. On video prompts the button reads Video and opens Video Studio. Only the text travels. |
Chat
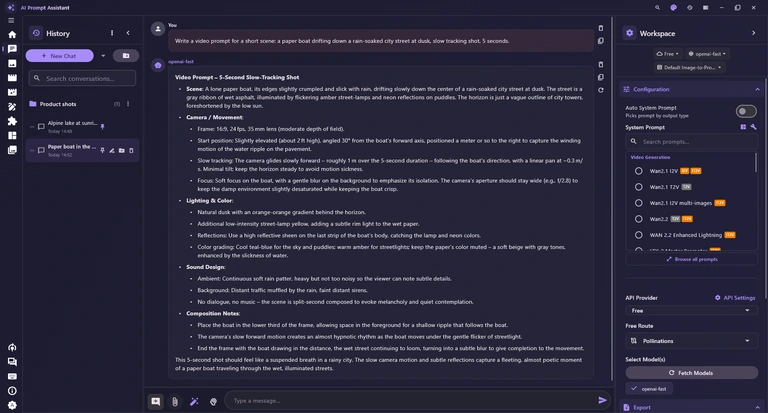
Chat is where you talk to AI models: ask for a prompt, refine it, or attach a picture and let the model turn it into a prompt. Replies come from the provider and model(s) you choose in the sidebar, and the system prompt steers what kind of answer you get. Every chat is saved automatically in the History panel after each reply, titled from your first message.
Writing and sending a message
Type in the box at the bottom and send with CtrlEnter. ShiftEnter always adds a new line; plain Enter sends only if you turn on Send message with Enter in Keyboard Shortcuts. If you tick several models in the sidebar, each one answers in turn with its own reply labelled with the model's name, which makes comparing easy.

| Item | What it does |
|---|---|
| New Chat | Opens a small menu: New Chat starts an empty chat, and New Chat (Keep Uploads) starts an empty chat that keeps the pictures or videos you attached last. |
| Attach (paper clip) | Opens the attach menu for pictures, and for videos with some providers. See Turning an image into a prompt. |
| Prompt Director (magic wand) | Opens Prompt Director Pro, which builds a prompt from menus without calling any AI. |
| Proactive Co-Creator (brain icon) | Turns the Co-Creator on or off. The icon is filled in while it is on. |
| Type a message... | Your message. ShiftEnter starts a new line. Clicking an example prompt chip fills the box for you. |
| Send (arrow) | Sends the message to every ticked model. Its tooltip shows the key: Send (Ctrl+Enter) or Send (Enter). |
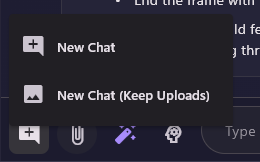
Both New Chat choices clear the screen and start a fresh conversation; the previous chat stays in the History panel. New Chat (Keep Uploads) is handy when you want to ask about the same picture again from scratch, for example with another system prompt. CtrlN also starts a new chat.
Attach Image accepts PNG, JPG, JPEG and WEBP files, several at once. Attach Video (MP4, AVI, MOV, MKV, WEBM, FLV, WMV, M4V) is listed only when the provider is Google or Local Enhancer; with other providers the app says Video upload only supported for Google and Local Enhancer. Attached files are copied into Documents\ai_prompt_assistant\temp_images (or temp_videos) and shown as thumbnails above the box: click one to preview it, or remove it with its X (see Where your files are kept).
Reading and managing replies
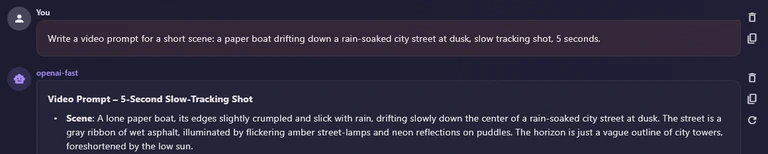
Your messages and the replies appear as bubbles, each headed by who wrote it: You or the model's name. Replies are formatted with headings and lists. Models that reason before answering show a collapsible Thinking section above the answer. The buttons to the right of each bubble act on that one message.
| Item | What it does |
|---|---|
| Delete (bin) | Removes that one message from the chat; the rest of the conversation stays. |
| Copy | Copies the message text. The app says Message copied to clipboard or Response copied to clipboard. |
| Regenerate (circular arrow) | Replies only. Removes that reply and asks again with the conversation as it is now; every ticked model answers again. |
While the models are answering, the composer is replaced by Generating responses... and a Stop button. Stop or Esc ends the answer early.
Turning an image into a prompt
Attach a picture and the model writes a prompt that describes or recreates it, ready for an image or video generator. This needs a model that understands images; the Free provider's default route could not read images in our tests, so choose a model known to understand them (see Which provider and key to use). With Auto System Prompt on, the app picks a matching system prompt from the attachment and the Image / Video switch, so with the default settings a picture gives you a prompt for turning it into a video. With it off, your chosen system prompt is used, and a ⚠ Warning appears in the chat if that prompt is not meant for images.
- Tick a model that understands images in the sidebar.
- Click Attach › Attach Image and pick one or more pictures.
- Click Analyze (or Analyze All for several files), which appears once something is attached, so no typing is needed. You can also type your own request instead, such as the style you want, and send it.
You can also drag pictures from File Explorer onto the Chat window: the overlay Drop images or videos into chat appears, and the files are attached when you let go. Videos are accepted only with Google or Local Enhancer, as with Attach Video.
Example prompts
Some system prompts come with sample requests. When Auto System Prompt is off and the system prompt you picked has examples, they appear as chips above the message box. Clicking a chip replaces whatever is in the box with that example; it does not send it, so you can edit it first. You can add examples to your own prompts in the Prompt Builder.

Up to eight chips are shown. If a system prompt has more than eight examples, a More (n) chip opens the Example Prompts sheet (Tap any example to paste it into the message box.) with the full list.
Proactive Co-Creator
Click the brain icon to turn the Co-Creator on. Your next message then gets no normal answer: the first ticked model studies your prompt (and any attached pictures) and returns an Interactive Prompt Co-Creator card with Entities & Attributes (each thing it found, marked Explicit if you said it or Inferred if it assumed it, with other values to choose from) and Clarifying Questions with answer chips. Make your changes and click Refine Prompt to get a Proposed Refined Prompt, which you can edit, then copy to the message box with Use as Input or send as a normal message with Accept & Send (this also turns the Co-Creator off). It follows the Image / Video switch in the sidebar, and it is not remembered: it switches off when you leave Chat or restart the app.
The Co-Creator relies on the model following detailed instructions exactly. With the Free provider it may fail with an error, which is why this manual shows no picture of its card. Pick a stronger model for it (see Choosing a model and Which provider and key to use).
Prompt Director Pro
Prompt Director Pro builds a detailed prompt from menus: you describe the subject, choose the model you will generate with, and pick style, camera, lighting and more from lists. It works entirely on your computer: no AI is called, no key is needed and it works offline. Open it with the magic-wand button (Prompt Director) to the left of the chat message box.

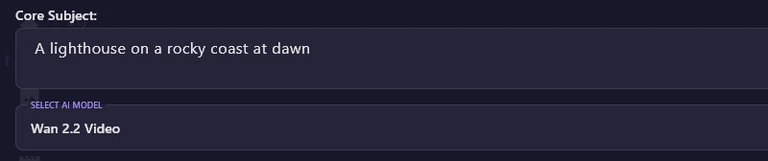
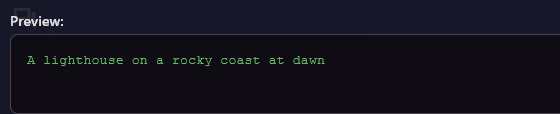
Type what the picture or video is about in Core Subject, for example "A lighthouse on a rocky coast at dawn". Then choose the model you will generate with in SELECT AI MODEL, which starts as -- Choose Model to Start --. The sections below appear only after you choose.
The list has two groups. Image Models: Flux 2, Flux Klien 4b/9b, Midjourney 7, Nano Banana, SeeDream 4, Z-Image, Z-Image Turbo and Qwen 2511, Qwen 2512. Video Models: Wan 2.2 Video, Wan 2.1 Video and LTX-2 Video.
The model you choose decides which sections appear. Flux 2, Midjourney 7, Nano Banana and SeeDream 4 get every image section; Z-Image gets only Style & Look and Composition, and Qwen only Style & Look and Lighting & Mood. Video models get Style & Look, World & Environment, Camera Gear, Lighting & Mood and Video Movement, but not Composition.

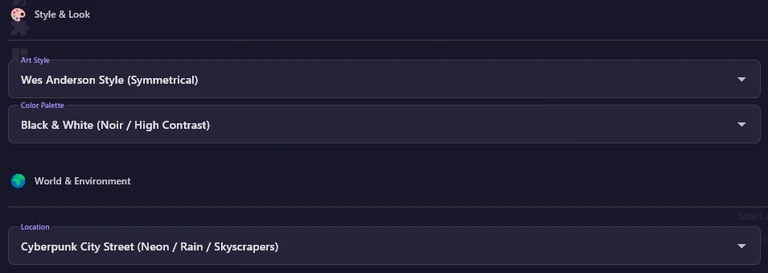

Each section holds lists you pick from; a list you leave empty is simply skipped. Style & Look has Art Style, Film Look / LUT (the colour look of a film stock or filter), Color Palette and Texture / Detail; World & Environment has Location and Weather / Atmosphere. Camera Gear has Camera Body, Focal Length, Film Format, Lens and Aperture, and Lighting & Mood has Lighting and Mood / Time.

Composition (image models only) sets the framing: Shot Size, how much of the scene is in the frame, and Angle, where the camera looks from.
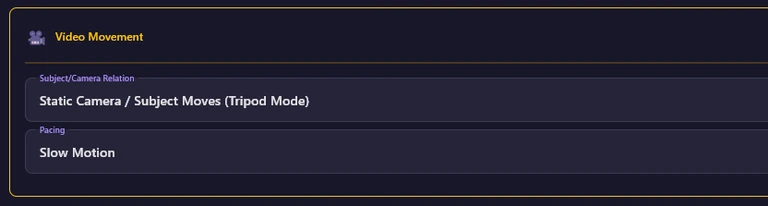
Video Movement (video models only) describes the motion: Subject/Camera Relation, Camera Movement and Pacing. The Pacing choices differ from model to model; Wan 2.1 Video, for example, offers Real-time and 60fps.
| Item | What it does |
|---|---|
| Randomize Settings | Picks a random value in every visible list and leaves your Core Subject alone. Available once a model is chosen. |
| GENERATE PROMPT | Joins your subject and every chosen option into one prompt, separated by commas, and closes the window. |
| Preview | Shows the assembled prompt live as you change things. When empty it reads Your prompt will appear here... |
The finished prompt is placed in the chat message box; if the box already has text, it is added after it, following a comma. It is not sent automatically: read it, edit it if you like, then send it, or copy it into Image Studio or Video Studio.
Image Studio
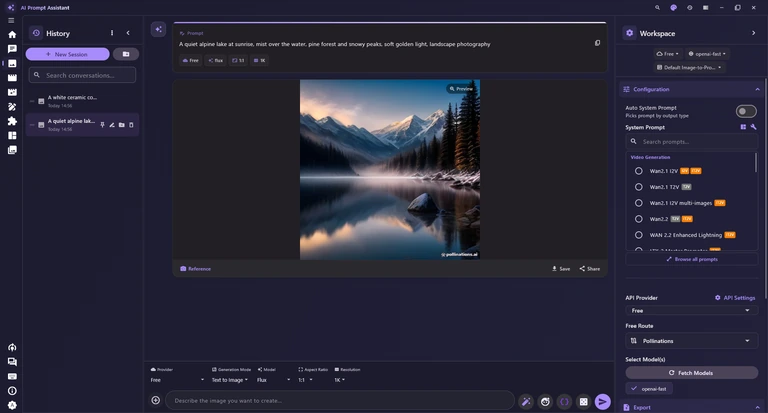
Image Studio creates pictures from a text description and, with some models, edits pictures you attach. You can start right away without any key: the Free provider makes pictures through a free public service. Open it from the navigation pane, its Home tile or Ctrl3.
Choosing provider, model and size
The row above the prompt box holds five lists. Image Studio has its own provider list, separate from the chat provider in the sidebar. The helper buttons, however, use your chat model (see Prompt tools).

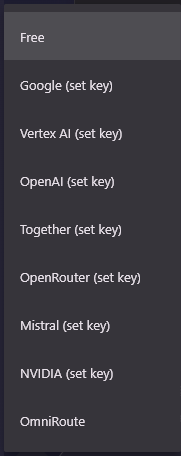
The providers are Free, Google, Vertex AI, OpenAI, Together, OpenRouter, Mistral, NVIDIA and OmniRoute. A provider that needs a key shows (set key) after its name and cannot be chosen until you enter its key in API Settings. OmniRoute needs no key but works only while its gateway program runs on your PC (see Providers).
The Free provider needs no key and no account. Its models, Flux, Flux Realism, Flux Anime, Flux 3D and Turbo, come from a free public image service, so your prompt is sent over the internet. They make pictures from text only. When no Google key is set, Image Studio opens on Free with Flux.
| Item | What it does |
|---|---|
| Provider | The service that makes the picture. Changing it changes the models on offer. |
| Generation Mode | Text to Image makes a picture from your words; Image to Image starts from pictures you attach. Only the modes the model supports are offered, and switching to Text to Image removes attached pictures. |
| Model | The model of this provider, for example Flux (Free), Nano Banana 2 (Google) or GPT Image 2 (OpenAI). |
| Aspect Ratio | The picture's shape, usually 1:1, 16:9, 9:16, 4:3 or 3:4. Some models offer fewer, and Free adds 21:9. |
| Resolution | The picture size, such as 1K or 2K. A few models, such as Nano Banana 2 and Nano Banana Pro, also offer 4K. |
Prompt tools
Type what you want in Describe the image you want to create... and press Enter or the send button. The buttons around the box start a new session, attach pictures and improve your prompt before you generate.

| Item | What it does |
|---|---|
| New Session | Starts a blank session; the current one stays in History. Not available while a picture is being made. |
| Attach Image (paper clip) | Shown in Image to Image mode. Adds one or more pictures as Reference thumbnails; remove one with its X. Dropping PNG, JPG, JPEG or WEBP files on the window also attaches them and switches to Image to Image. |
| Improve Prompt (magic wand) | Rewrites your prompt into a richer, more detailed one, which appears in the box as it is written. It can also take attached pictures into account. |
| Preserve Face Prompt (face) | Builds a prompt that keeps the face of the person in an attached picture. Attach a picture first; see Preserve Face. |
| JSON Enhance (curly brackets) | Turns your prompt, or an attached picture, into a structured prompt that spells out each part of the picture under its own label, plus a master_prompt summary. It replaces the text in the box. |
| Surprise Me (dice) | Writes a random creative prompt for you. In Image to Image mode it suggests an edit to your picture instead. |
| Generate Image (send arrow) | Starts making the picture; Enter does the same. While it works, the button becomes Stop generation. |
Improve Prompt, JSON Enhance, Surprise Me and Preserve Face Prompt do not use the image provider. They ask the chat model selected in the sidebar (the first ticked model), together with the active system prompt. If no model is ticked, the app says Please select at least one text model in settings first.
Preserve Face
Preserve Face Prompt helps you put the same person into a new scene. The chat model describes the face in your picture and writes a prompt that asks the image model to keep that face. It needs a chat model that understands images, and an image model that offers Image to Image.
- Attach a picture of the person with Attach Image, or click Reference on a picture you made.
- Click Preserve Face Prompt and choose One Person or Multiple People under Subject Count.
- Choose Preset Only, Improve My Prompt or Combine Both, and pick a scene under Preset Transformation.
- Click Build Prompt. The prompt appears in the box and the mode switches to Image to Image; check it, then generate.
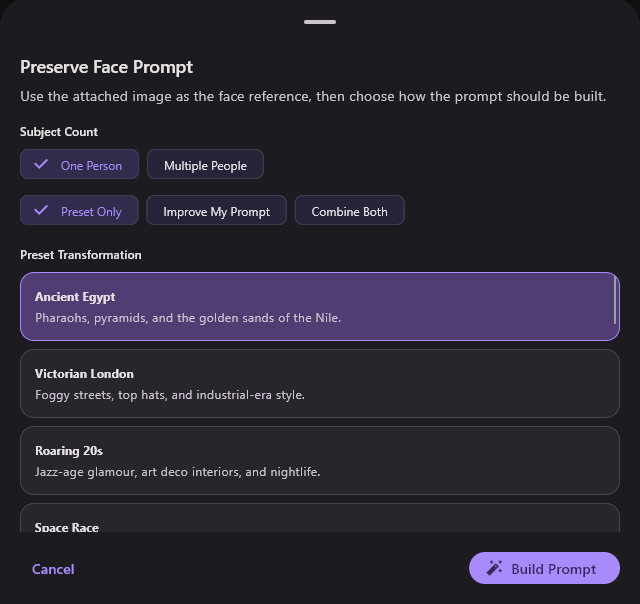
Preset Only writes the prompt from the chosen scene alone, Improve My Prompt builds on the text you typed, and Combine Both blends your text with the scene; with an empty prompt box only Preset Only is offered. There are 22 presets in total, from Ancient Egypt, Victorian London and Feudal Japan to Cyberpunk Megacity, Underwater Kingdom and Dream Circus. Cancel closes the panel without changing anything.
Your pictures
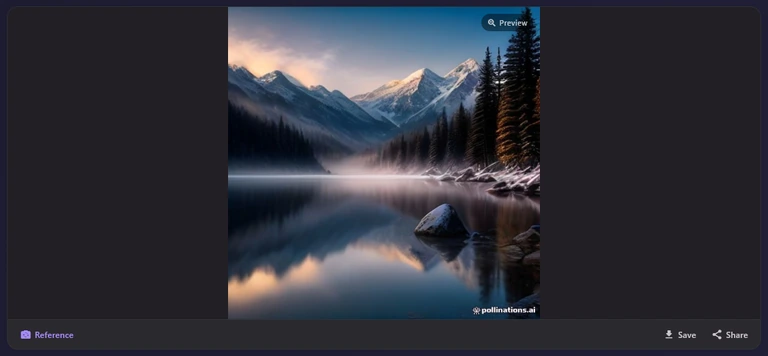
While a picture is being made you see Creating your image... and This may take a few moments. Each finished picture appears in a card, with its prompt above it. If something goes wrong, the card says Generation Failed with the reason.

| Item | What it does |
|---|---|
| Copy Prompt | The copy icon beside the prompt copies it (Prompt copied to clipboard). |
| Reference | Uses this picture as the only reference for your next image and asks for Image to Image, so you can edit or vary it. |
| Save | Opens the Windows Save As dialog (Save Image) so you choose the folder and name. The app confirms with Image saved successfully. |
| Share | Opens the Windows share sheet to send the picture, with its prompt, to another app or person. |
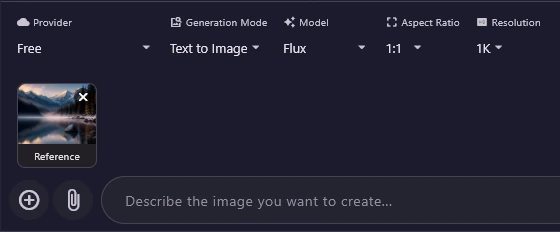
After Reference, the picture sits above the prompt box: describe the change you want and generate. This works only with a model that offers Image to Image. The Free models make pictures from text only, so for editing choose, for example, a Google or OpenAI model, which needs its API key.
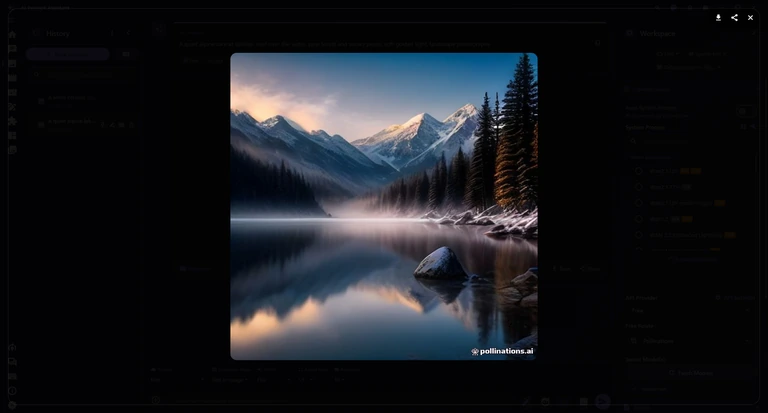
Click a picture (it shows a Preview badge) to open it full screen. Zoom from 0.5x to 5x and drag to look around. The icons at the top right are Save, Share and Close; clicking outside the picture also closes it.
Sessions and where pictures are kept
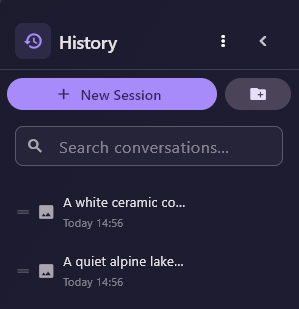
Each prompt and its pictures belong to a session, saved automatically in Image Studio's own History panel (marked with an image icon) and titled from the first prompt; failed attempts are kept too. The studio opens on a blank session each time: click a session in History to go back to it, or use New Session to start fresh.
Generated pictures are kept automatically in the Windows temporary folder until you Save them. Windows clean-up tools can empty that folder, and older sessions may then show missing pictures. So Save every picture you want to keep to a folder of your choice (see Where your files are kept).
Video Studio
Video Studio makes short video clips from a description, from a picture, between two pictures, or by extending a clip you already have. It works like Image Studio: settings above the prompt box, results as cards and sessions in the History panel. Open it from the navigation pane or with Ctrl4.
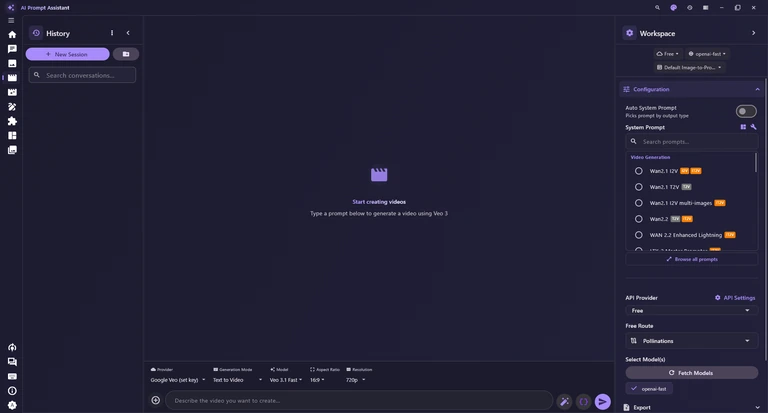
There is no free video option: every Video Studio provider except OmniRoute needs your own API key, and OmniRoute works only while its gateway program runs on your PC. Get a key from the provider, for example Google, and enter it in API Settings; see Which provider and key to use. The screenshots in this chapter show the screen without a key.

Choosing provider, mode and model

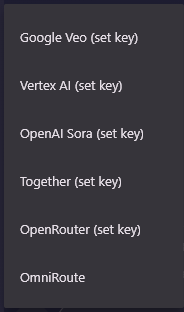
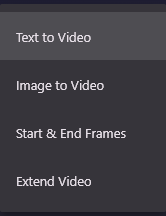
Google Veo and Vertex AI offer the Veo models (Veo 3.1 Fast, Veo 3.1, Veo 3.1 Lite, Veo 3 Fast, Veo 3 and Veo 2), and OpenAI Sora offers Sora 2 and Sora 2 Pro. Together and OpenRouter offer a few models of their own, and OmniRoute lists the models your gateway reports. Not every model supports every mode; for example, Veo 3 and Veo 3 Fast have no Start & End Frames. Every mode still needs a text prompt.
| Item | What it does |
|---|---|
| Text to Video | Makes a clip from your prompt alone. |
| Image to Video | Brings one picture to life; it becomes the Start Frame of the clip. |
| Start & End Frames | Makes a clip that moves from one picture to another. The first picture you attach is the Start Frame, the second the End Frame. |
| Extend Video | Continues a clip you already have (the Input Video), optionally ending on a picture you choose. |
Aspect Ratio is 16:9 (landscape) or 9:16 (portrait); some OpenRouter models offer more. Resolution is 720p or 1080p, though Veo 3.1 Lite, Veo 2 and Sora 2 make 720p only. There is no length setting: the model decides how long the clip is.
Attaching pictures and videos
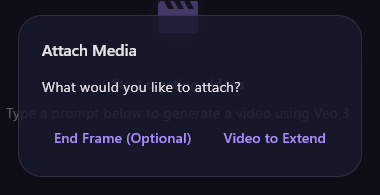
The Attach Media button appears in every mode except Text to Video. In Extend Video it asks What would you like to attach?: Video to Extend picks the clip, and End Frame (Optional) a picture to end on. Changing the provider or the mode clears what you attached.
You can also drag files onto the window (the overlay reads Drop media for video generation). A video (MP4, AVI, MOV, MKV, WEBM, FLV, WMV or M4V) switches to Extend Video; one picture switches to Image to Video, and two to Start & End Frames.
Type what you want in Describe the video you want to create... and press Enter or the round send arrow at the right end of the box (Generate Video); while a clip is being made, the same button becomes Stop generation. The round plus button at the left end (New Session) starts a blank session, and the current one stays in the History panel. Improve Prompt and JSON Enhance work as in Image Studio, tuned for cinematic video prompts, and they too use your chat model from the sidebar. Video Studio has no Surprise Me or Preserve Face Prompt.
Your videos
- While a clip is made you see Generating video. This may take a few minutes... The finished video then plays right in its card.
- Save opens the Windows Save As dialog (Save Video) so you can store the clip as an MP4 file where you like.
- Share opens the Windows share sheet to send the video to another app, and Copy Prompt copies the prompt that made it.
- Extend continues the clip. Sora extends it with its own feature; with other models the app takes the last frame, makes a new clip from it and joins the two.
Like pictures, videos are kept in the Windows temporary folder until you Save them, and Windows clean-up tools can remove them from there. Save the ones you want to keep. Your sessions stay in Video Studio's own History panel.
Storyboard
The Storyboard tab turns a video, often one made with AI, into a shot-by-shot storyboard. It finds where each shot begins and ends, lets you correct every cut, has an AI model describe each shot, and lays the shots out as a printable storyboard sheet or as a regeneration package for a video model. Open it from the navigation pane or with Ctrl5.
- Import: choose a video and let the app find the cuts between shots.
- Timeline: check the cuts, and split, merge or delete them until every shot is right.
- Shot analysis: let an AI model describe what happens in each shot.
- Composer: pick a style, arrange the sheet and export it as a picture, a PDF or a regeneration package.
Import a video and detect the shots
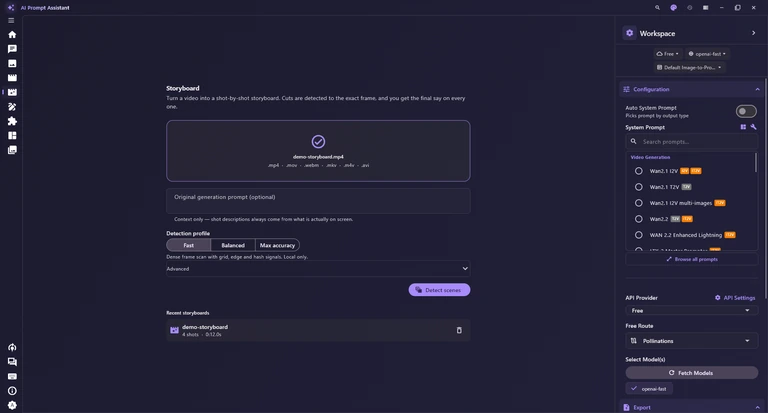
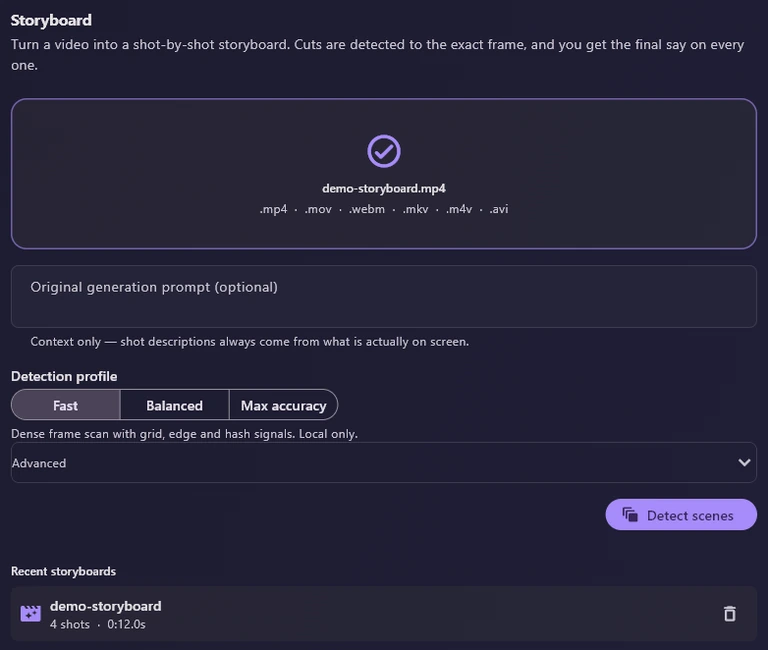
- Drag a video onto the box that says Drop a video here, or click to choose one, or click that box to pick a file. The tab accepts .mp4, .mov, .webm, .mkv, .m4v and .avi files. Until a video is chosen, Detect scenes stays greyed out, and Recent storyboards appears only once you have at least one saved storyboard.
- If you still have the prompt the video was made from, paste it into Original generation prompt (optional). It is context only: shot descriptions always come from what is really on screen, but the prompt lets the app check each shot against it and write better clip prompts later.
- Pick a Detection profile (see the table below) and, if you like, adjust the cut threshold under Advanced.
- Click Detect scenes. A progress bar follows the scan, and a Cancel button appears while it runs: it stops the scan and leaves you on the import screen with the video still chosen, so you can change the profile and try again. The storyboard is already listed under Recent storyboards, still without shots; delete it there with its bin if you do not want it. If the free video tool FFmpeg is missing, the app downloads it once first. When the scan ends, the timeline opens.
| Item | What it does |
|---|---|
| Fast | Scans the frames closely and compares their layout, edges and overall look. It runs entirely on your computer, with no model and no internet. |
| Balanced | The default and recommended choice. It adds a small shot-detection model that the app downloads once (about 31 MB) and keeps; if that model cannot run, the scan falls back to the Fast method. |
| Max accuracy | Adds an AI check of every cut and a sweep through unusually long shots, using the vision model chosen in the sidebar; this sends many frames to that model, so it makes paid calls if the model is a paid one. The AI never deletes a cut on its own, and missed cuts it finds appear as suggestions you can preview, dismiss or add. |
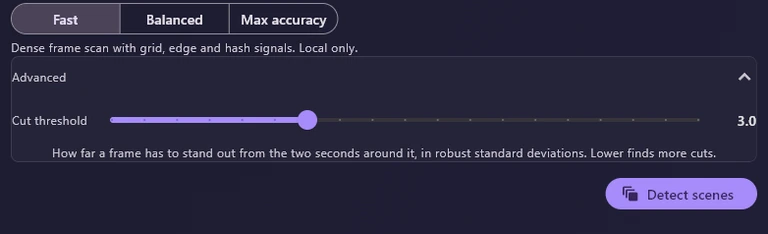
Advanced › Cut threshold sets how much a frame has to stand out from the two seconds around it to count as a cut. The slider runs from 1.5 to 6.0 and starts at 3.0. Lower values find more cuts, including some false ones; higher values find fewer.
Recent storyboards lists your saved projects with their name, number of shots and length; click one to reopen it on the timeline. The bin icon deletes a storyboard at once, without asking for confirmation, so use it with care. Projects are saved automatically in Documents\ai_prompt_assistant\data\storyboards, one folder per storyboard (see Where your files are kept).
The timeline: check and fix the cuts
The timeline shows the video in a player, the list of shots beside it and a filmstrip with a marker at every cut. Nothing is final until you are happy: split, merge, move or delete cuts until each shot is right. Every change is saved automatically, and the header briefly shows Saving… and then Saved.
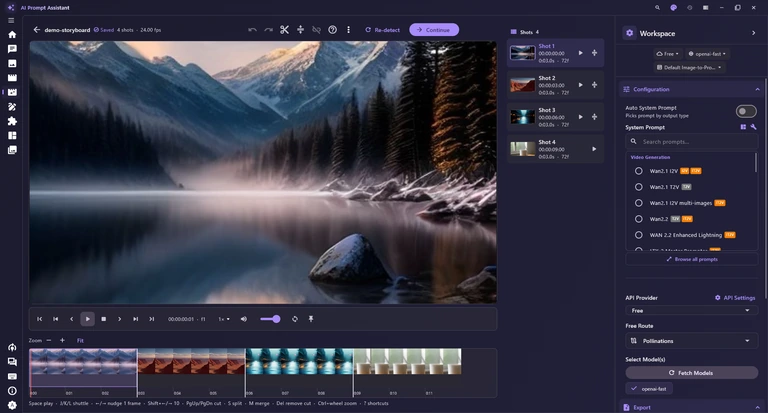


| Item | What it does |
|---|---|
| Back to import | The arrow before the project name. Saves the project and returns to the import screen. |
| Undo / Redo | Undo or redo your recent edits to the cuts (CtrlZ and CtrlY). |
| Split at playhead | The scissors add a cut where the playhead is, dividing the shot in two (S). |
| Merge | Joins the selected shot with the next one, or joins all the selected shots into one (M). |
| Delete the selected cut | Removes the cut marker you selected, so the shots on either side become one (Delete). Greyed out until a cut is selected. |
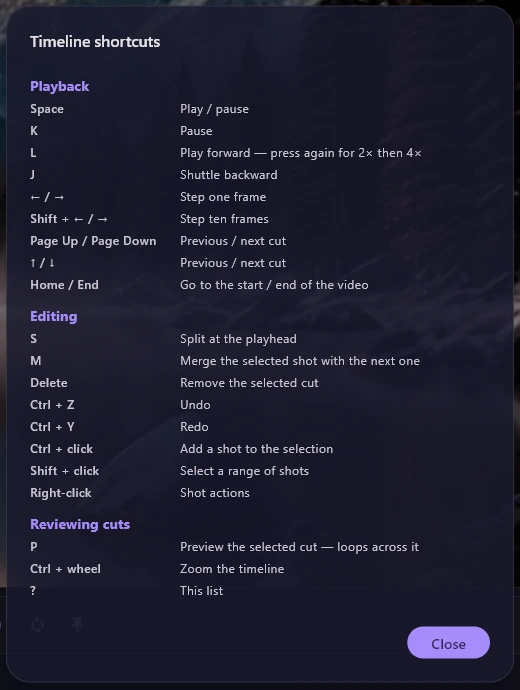
| Keyboard shortcuts | The question mark opens the Timeline shortcuts list (?). |
| More | The three dots open a menu for cut lists and uncertain cuts, described below. |
| Re-detect | Runs detection again and rebuilds every cut. If you have edited the cuts, it first asks Discard manual edits? with Keep my edits or Re-detect. |
| Continue | Saves, takes three still frames from each shot (first, middle and last) and opens Shot analysis. |

Click anywhere on the filmstrip to move the playhead there. Click a cut marker to select it: ← and → then move it by one frame (Shift with an arrow moves ten), and dragging it shows the frames on either side so you can place it exactly. Use − and + (or Ctrl with the mouse wheel) to zoom, and Fit to see the whole video again.
Cuts the detector is less than 50% sure about are drawn in amber; hover over one to see why. An amber bar then says how many cuts it was unsure about, with a button such as Review 3 uncertain cuts. Review mode visits them one by one: choose Keep, Remove or Merge next → (keep the cut but merge the short shot after it), press P to preview the cut again, and click Finish reviewing when you are done.

From left to right: Go to start (Home), Previous cut (Page Up), Back one frame (←), Play / Pause (Space), Stop (back to the start of this shot), Forward one frame (→), Next cut (Page Down) and Go to end (End). Click the timecode to type a time or a frame number. Then come the playback speed (0.25× to 2×), Mute and volume, Loop the selected shot (the circular arrows) and Snap the playhead to cuts (the pin at the far right).
The Shots list shows each shot with a thumbnail, its start timecode, its length and its number of frames. Click a shot to select it and jump to it; hold Ctrl and click to add shots to the selection, or hold Shift and click to select a range, then use Merge selected. Each row has Play this shot and Merge with next shot. Double-click a shot to loop it, or right-click it for the shot menu.
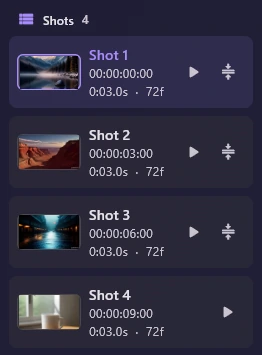
The More menu and the shot menu
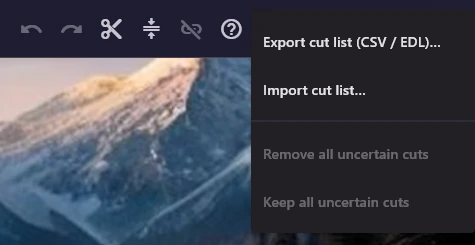
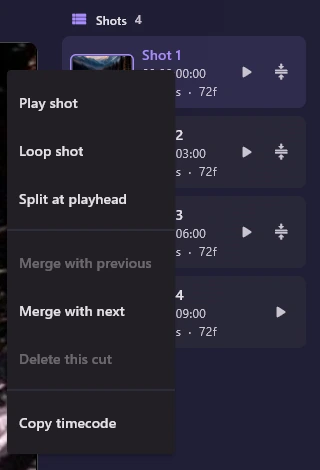
| Item | What it does |
|---|---|
| Export cut list (CSV / EDL)… | Saves the list of cuts to a file you name. A CSV file opens in a spreadsheet; give the name the ending .edl to get an EDL, a cut list that video editing programs can read. |
| Import cut list… | Loads cuts from a .csv or .edl file. It first asks Replace the cut list?, and you can undo it afterwards. |
| Remove all uncertain cuts | Deletes every cut marked as uncertain in one go. A message offers Undo. |
| Keep all uncertain cuts | Keeps every uncertain cut as a real cut, so you do not have to review them one by one. A message offers Undo. |
| Item | What it does |
|---|---|
| Play shot | Plays this shot from its start. |
| Loop shot | Plays this shot over and over until you stop it. Double-clicking the shot does the same. |
| Split at playhead | Adds a cut at the playhead, dividing the shot in two. |
| Merge with previous | Joins this shot to the one before it. Greyed out on the first shot. |
| Merge with next | Joins this shot to the one after it. When several shots are selected, Merge selected into one shot also appears. |
| Delete this cut | Removes the cut at the start of this shot, so it joins the shot before it. Greyed out on the first shot. |
| Copy timecode | Copies the timecode where this shot starts, ready to paste elsewhere. |
Timeline shortcuts
Press ? or click the question mark to see every timeline shortcut. J, K and L work as in video editors: L plays forward (press it again for 2× and then 4×), K pauses and J shuttles backward. P loops playback across the selected cut so you can judge it. The shortcuts do not work while you are typing in a text box; the full list is also in Keyboard shortcuts.
Shot analysis
Shot analysis asks an AI model to describe each shot. The model looks at the first, middle and last frame of the shot and fills in Visual, Action, Camera and Lighting, with a hint for Dialogue. The chips at the top show the provider and model in use; click one to change it (see Choosing a model). You can also type in any field yourself, and the analysis never overwrites a field you edited.

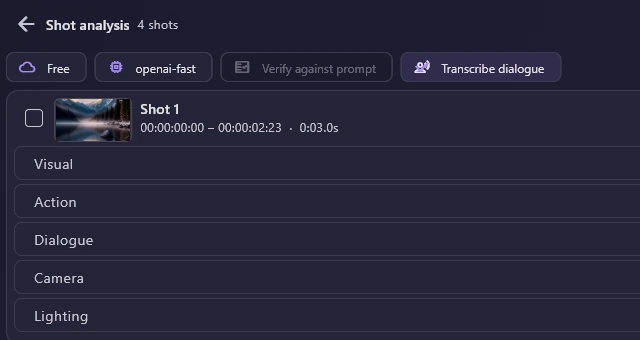

| Item | What it does |
|---|---|
| Back to timeline | Returns to the timeline so you can adjust the cuts. |
| Analyze selected | Analyses only the shots whose boxes you ticked; the button shows how many that is. |
| Analyze all | Analyses every shot, three at a time. While it runs you can click Stop, and a shot that fails offers Retry this shot. |
| Compose | Opens the Composer. You can compose before or after running the analysis. |
| Verify against prompt | Compares each shot with the original prompt from the import screen and marks whether it matches the prompt, partly deviates from it or does not match. It costs one extra model call per shot, is on by default when there is a prompt, and may suggest cuts that were missed. |
| Transcribe dialogue | Listens to the video's sound on your own computer and puts the spoken lines on the shots they belong to. On first use it downloads the Whisper speech-recognition program and model; you choose the model in the Local Enhancer settings. On by default. |
Shot analysis sends pictures to the model, so the model you choose must be able to understand images; otherwise the app says Choose a vision-capable model first. The Free provider's default route could not read images in our tests, which is why the screenshots show this screen before any analysis. See Recommended models and which key you need.
The Composer: build and export the sheet
The Composer lays the shots out as a storyboard sheet: styles on the left, the sheet in the middle, layout and export options on the right, and the shot strip along the bottom. The header has Back to analysis, Edit all images (one instruction applied to every frame by an AI image-editing model, which you then review) and Fit the sheet to the window. When a clip limit is set, it also shows which part you are looking at.
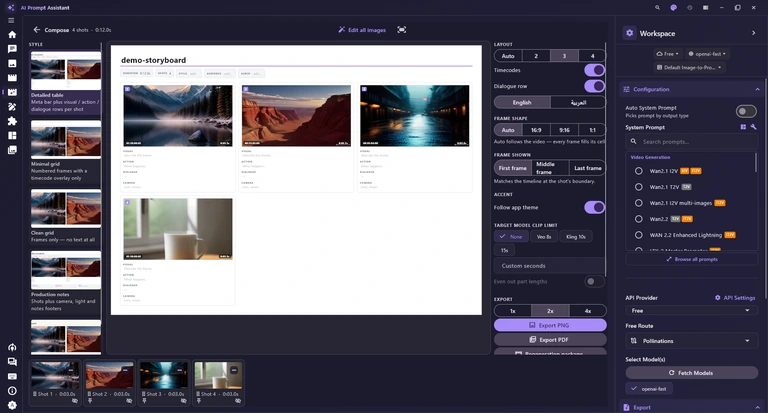
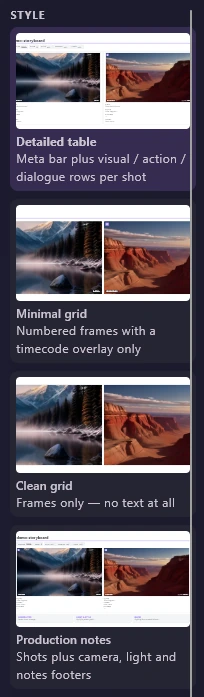
The STYLE column on the left offers five looks for the sheet. Click one and the sheet is redrawn at once.
| Item | What it does |
|---|---|
| Detailed table | A bar with the project details at the top, and rows for visual, action and dialogue under each shot. |
| Minimal grid | Numbered frames with only a timecode over each one. |
| Clean grid | Frames only, with no text at all. |
| Production notes | Shots with camera, lighting and notes underneath each one. |
| Character sheet | A page with a hand-drawn feel. This style also adds the Character page option (see the options table below). |
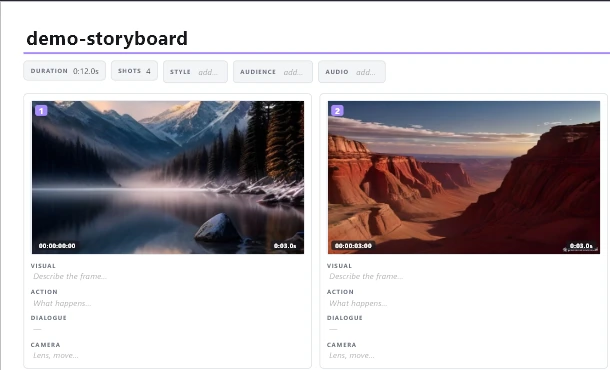
Click any text on the sheet, including the title and the grey hints, to edit it in place. Enter keeps the change, ShiftEnter starts a new line and Esc cancels; clicking elsewhere also keeps it. You can also drop a picture onto a shot to replace its frame.
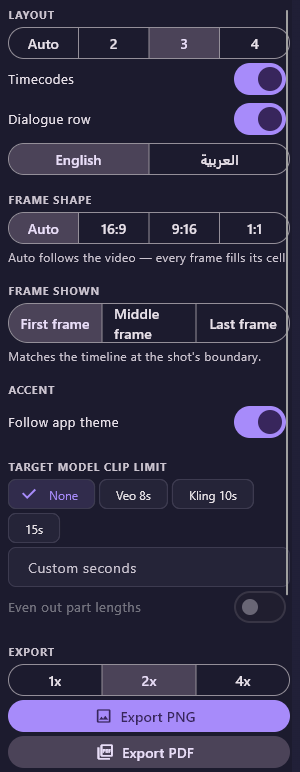
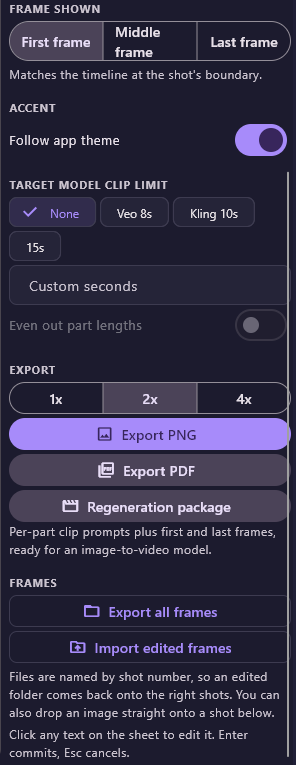
| Item | What it does |
|---|---|
| Layout | The number of columns: Auto or 2 to 4 (up to 6 for tall videos). The switches show or hide Timecodes and the Dialogue row, and English / العربية sets the language of the sheet's own labels. |
| Frame shape | Auto follows the video. 16:9, 9:16 or 1:1 force a shape; the picture is fitted inside with bars rather than cropped. |
| Frame shown | Which still stands for each shot: First frame, Middle frame (useful when a shot begins with a fade) or Last frame. |
| Accent | The colour of the sheet's lines and highlights. Follow app theme uses the app's own colour; switch it off to pick one of six colours. |
| Target model clip limit | Splits the storyboard into parts short enough for a video model: None, Veo 8s, Kling 10s, 15s or Custom seconds. Even out part lengths balances the parts, and a shot longer than the limit is split, with Adjust in timeline to fix it by hand. |
| Export PNG | Saves the sheet as a picture at the quality chosen under EXPORT (1x, 2x or 4x), in a place you choose. If the sheet has several parts, you choose a folder and each part gets its own file. |
| Export PDF | Saves the sheet as a PDF document, one page per sheet, in a place you choose. |
| Regeneration package | Saves, in a folder you choose, what an image-to-video model needs to remake the video part by part: the first and last frame of every part and every shot, plus a summary file with the timing, the shot descriptions and an AI-written clip prompt for each part. Each part starts from the previous part's last frame so the clips join up; without a model selected, the clip prompts are left out. |
| Export all frames | Saves every shot's frame as a picture named by shot number, into a folder you choose, so you can edit them in another program. |
| Import edited frames | Pick the folder with your edited pictures: each one is matched to its shot by the shot number in its file name and replaces that frame on the sheet. |
| Character page | Only with the Character sheet style, and lower in the options column than the screenshot shows. Generate design page asks an image model to draw the main character from the front, three-quarter and side views, with expressions, based on frames from the four longest shots, and adds the drawing to the sheet under CHARACTER DESIGN; the button then reads Regenerate design page. It needs an image model that accepts reference images and an API key for that provider (see API Settings). |
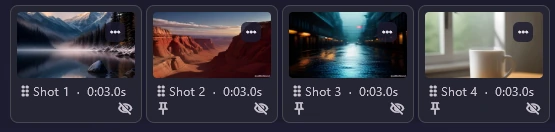
The shot strip under the sheet has one card per shot; drag a card by its handle to change the order on the sheet. The pin (Start a new part here) makes a new part begin at that shot, and the crossed eye (Hide from the sheet) takes the shot off the sheet; hidden shots are listed under Hidden from the sheet:, where a click brings one back. The … button opens Edit image…, to change the frame by describing the change to an AI image model, and Edit externally, which opens the frame in your usual picture editor and updates the shot when you save it.
SVG Studio
SVG Studio asks an AI model to draw vector art: icons, logos, simple scenes and even small looping animations. An SVG is a picture made of shapes and lines rather than pixels, so it stays sharp at any size and can be opened as text. It uses the provider and first model chosen in the sidebar; open it from the navigation pane or with Ctrl6.
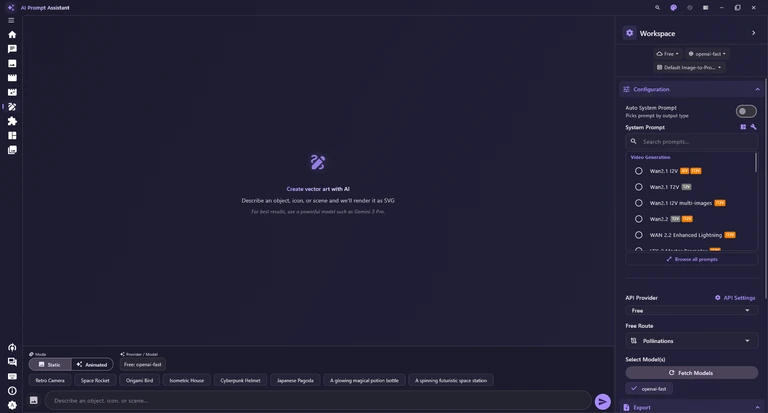
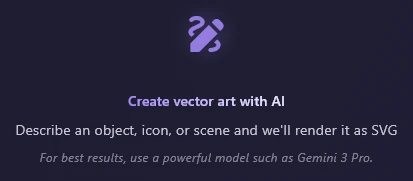
An empty SVG Studio reads Create vector art with AI and Describe an object, icon, or scene and we'll render it as SVG. Below that, the app itself advises: For best results, use a powerful model such as Gemini 3 Pro.
Making an SVG

- Check Provider / Model. It only shows the model chosen in the sidebar, so change it there if needed; Local Enhancer cannot make SVGs.
- Choose Static for a still picture or Animated for a looping animation.
- Describe what you want in Describe an object, icon, or scene... If you like, add a picture with the round picture button to the left of the box (Upload reference image; PNG, JPG or WEBP) or drop one on the window; a picture on its own asks the model to recreate it as an SVG.
- Press Enter or click the round send arrow at the right end of the box (its tooltip reads Generate SVG). While it works you see Generating vector art... and the same button becomes Stop generation; click it or press Esc to cancel.
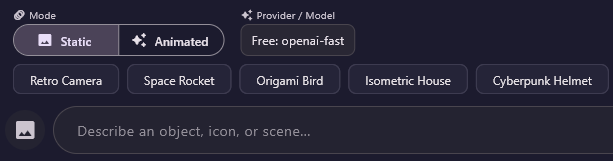

The eight suggestion chips only fill the prompt box with their text. Nothing is sent until you press Generate SVG, so you can edit the idea first.
Using the result
| Item | What it does |
|---|---|
| Copy SVG Code | Copies the SVG as text, ready to paste into a web page or a design program. |
| Download SVG | Opens the Windows Save As dialog (Save SVG) to save the file. Results are not kept when you leave, so download what you want to keep. |
| Export / Play Animation in Browser | Export is the last icon, a square with an arrow, and saves the drawing in another format: Export as PNG (at twice the size) for any result, plus Export as GIF, Export as Animated PNG, Export as MP4 and Export as MOV for animated ones; each asks where to save. Animated results also have Play Animation in Browser, the play icon before the others, which plays the animation in your web browser. |
As the app itself recommends, SVG Studio works best with a powerful model. With the Free provider the SVG code may be produced while the preview stays on a spinner, so pick a stronger model (see Choosing a model and Which provider and key to use). The in-app animation preview also needs Microsoft's WebView2 runtime; if it is missing, the app offers Download WebView2.
PromptFill
PromptFill builds prompts from templates with blanks. A template such as A {{style}} photo of {{subject}} has blanks that you fill by picking words from word banks, so you can make many variations of one idea quickly. The app comes with a large set of ready-made templates and word banks, and you can add your own. Open it from the navigation pane or with Ctrl7.
Explore the templates
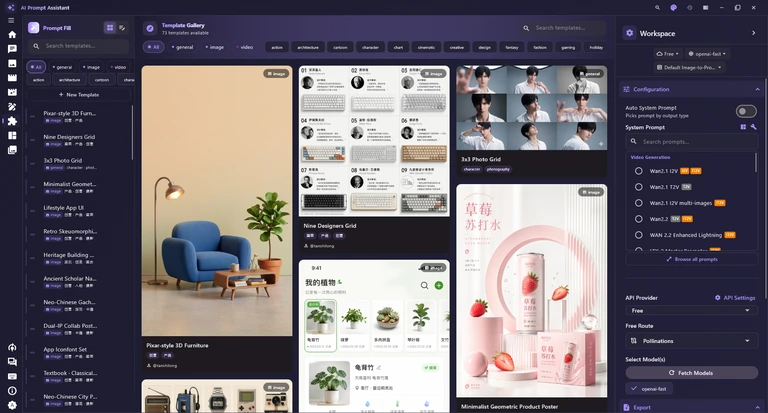

The two buttons at the top of the sidebar switch between Explore, a gallery of cover cards, and Editor, where you fill in one template. In the Template Gallery, search with Search templates…, narrow the list by type (general, image, video) or by a tag, and click a card to open it in the Editor. Most built-in covers are pictures loaded from the internet, so they need a connection to show.
The Prompt Fill sidebar lists every template, with the same search box and filter chips. Drag a template by its handle to reorder the list, and hover over a template to see its buttons.
| Item | What it does |
|---|---|
| New Template | Adds a new template with the starter text A {{style}} photo of {{subject}}, ready for you to change. |
| Rename | Appears when you hover over a template and opens Rename Template. Double-clicking the name does the same. |
| Duplicate | Appears when you hover over a template. It makes a copy with (Copy) added to its name, opens the copy in the Editor and saves it as your own template, so your changes to it are kept. |
| Delete | Appears when you hover over a template and removes it after asking Delete Template?. A template you created or duplicated is gone for good; a deleted built-in template comes back the next time the app starts. |
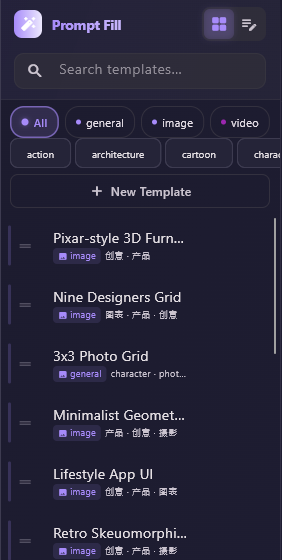
Type the new name in Template name and click Rename. Tip: to keep your own version of a built-in template, click Duplicate first and edit the copy, because changes made directly to a built-in template may be lost when the app restarts.

Fill in a template in the Editor

| Item | What it does |
|---|---|
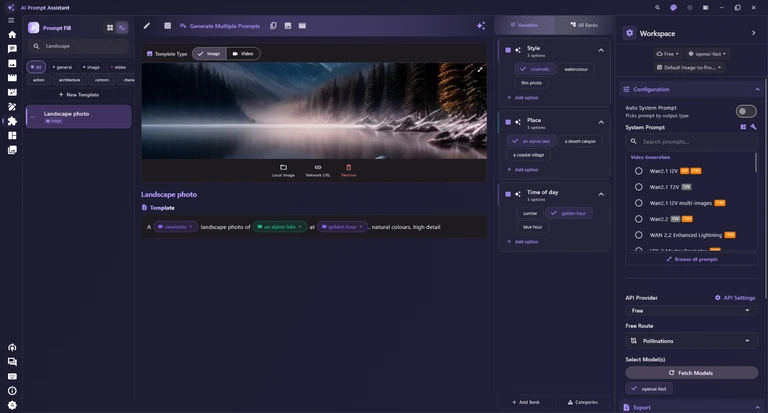
| Edit Template / Save | The pencil opens the template text for editing (see Edit a template); while you edit, a tick takes its place to save. |
| Randomize All | The dice fills every blank with a random option from its word bank. |
| Generate Multiple Prompts | Makes a batch of filled-in prompts at once (see Many prompts at once). |
| Copy Prompt | Copies the finished prompt; the app briefly confirms with Copied!. |
| Send to Image Studio | Puts the finished prompt into Image Studio and switches to it. |
| Send to Veo Video | Puts the finished prompt into Video Studio and switches to it. |
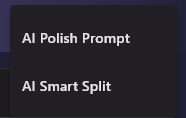
| AI Tools | The sparkle at the right opens AI Polish Prompt and AI Smart Split, described below. Both need a chat AI model. |

In the template, ordinary words stay as they are and each blank appears as a coloured chip showing its current choice. The finished prompt is the same text with each chip replaced by its value. Click a chip to change it.
Clicking a chip opens its picker, listing the options from the word bank of the same name; click an option to use it. Replace variable with current value turns the blank into ordinary text in the template, fixed to its current value.
| Item | What it does |
|---|---|
| Smart Terms | Marked Beta. Asks the chat AI for eight options that fit the rest of your prompt and lists them under AI Suggestions; Regenerate Smart Terms asks again. These suggestions are not added to the word bank. |
| Filter options... | Type here to shorten a long list of options. |
| Custom value... | Type your own word and click the plus button (Use custom value) to use it. The word is also added to the word bank for good. |
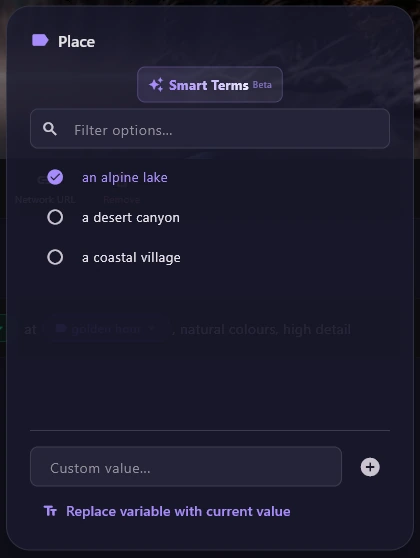
The sparkle button at the right of the toolbar opens the AI Tools menu. Both tools use the chat AI provider and model chosen in the sidebar.
| Item | What it does |
|---|---|
| AI Polish Prompt | Rewrites the finished prompt to be more vivid and shows it as AI Polished Prompt, with Dismiss and Copy. Your template is not changed. |
| AI Smart Split | Works the other way round: turns the finished prompt back into a template, swapping key words for blanks and reusing existing word banks where it can. It replaces the template text, and Undo brings the old text back. |
Many prompts at once
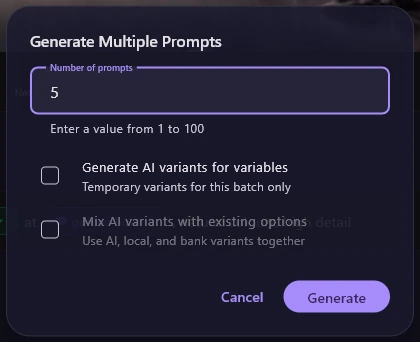
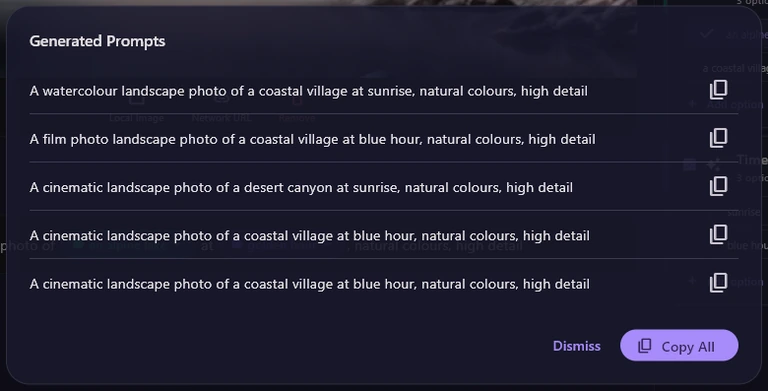
Generate Multiple Prompts fills the template many times with different choices, giving you a list of variations in one go. Without the AI options it works offline; with them it needs a chat AI model, and if none is set up the app says Configure an AI model in Chat settings first.
| Item | What it does |
|---|---|
| Number of prompts | How many prompts to make, from 1 to 100. The default is 5. |
| Generate AI variants for variables | Asks the chat AI for extra options for each blank, used for this batch only; they are not saved to your word banks. |
| Mix AI variants with existing options | Available once the first box is ticked. Uses the AI options together with the options already in your banks. |
| Generated Prompts | The results window. The copy button on a line (Copy Prompt) copies that prompt, Copy All copies the whole list, and Dismiss closes the window. |
Edit a template
Click the pencil (Edit Template) to change the template itself. The text becomes an editable box in which blanks are written in double curly braces, such as {{place}}; {{style: watercolor}} also sets a default value, and numbered blanks such as {{name-1}} and {{name-2}} form a linked group. While you edit, the toolbar shows a tick to save, a cross to cancel, Undo and Redo.
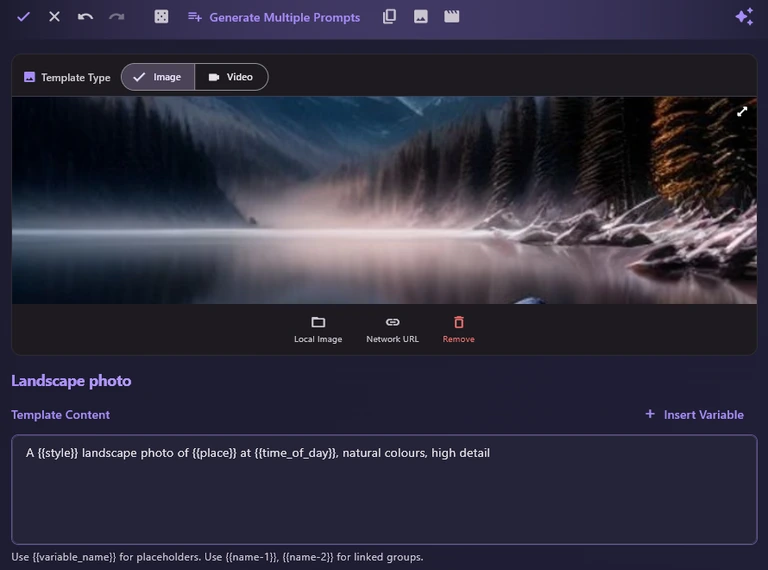
| Item | What it does |
|---|---|
| Template Type | Image or Video. It changes only the preview: an image template has a cover picture, and a video template has a video preview with Set Video URL, Cover Image, Local Cover and Clear Video. The prompt text is the same either way. |
| Local Image | Uses a picture from your computer as the cover. The app links to the original file, so if you move or delete it the cover disappears. |
| Network URL | Uses a picture from a web address as the cover; it needs an internet connection to show. |
| Remove | Removes the cover picture. |
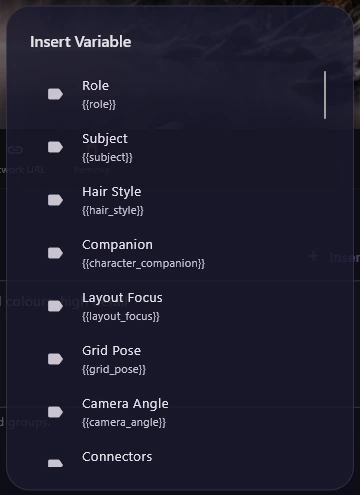
| Insert Variable | Opens a list of every word bank; click one to insert its blank where the cursor is. Custom variable... lets you type a new name. |
| Save | The tick saves your changes to the template; the cross throws them away. |
Insert Variable saves you typing the braces: each entry shows a bank's name and the blank it inserts, such as {{subject}}. A blank with no word bank behind it still works; its picker says No bank defined — type manually.
Word banks and categories
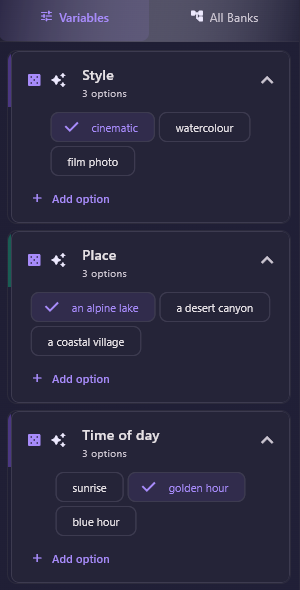
The panel on the right holds the word banks: the lists of options for each blank. Each bank card has a dice to pick one of its options at random, a sparkle (AI Generate) that asks the chat AI for eight new options and adds them to the bank for good, and Add option. Click an option to put it in the template, or right-click it for Set as default or Delete option.
| Item | What it does |
|---|---|
| Variables / All Banks | Variables shows only the banks this template uses; All Banks shows every bank, grouped by category. |
| Add option | Adds your own word or phrase to that bank. |
| Add Bank | At the bottom of the panel. Opens New Word Bank to create a bank (the fields are explained below). |
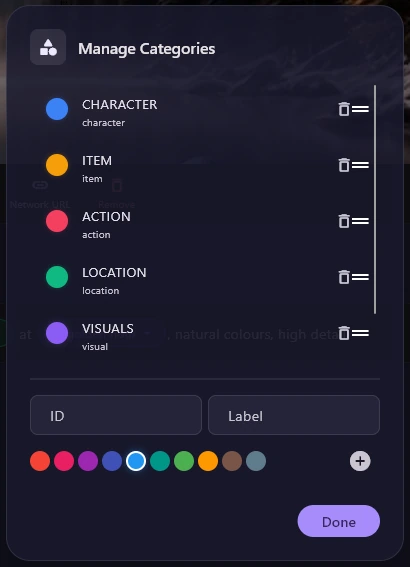
| Categories | At the bottom of the panel. Opens Manage Categories. |
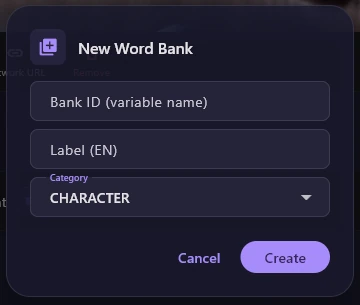
| Item | What it does |
|---|---|
| Bank ID (variable name) | The name you write between the braces, for example mood for {{mood}}. It is made lowercase with spaces turned into underscores, and an ID that already exists is refused. |
| Label (EN) | The friendly name shown on the bank card and in the lists. |
| Category | The group the bank belongs to in All Banks. |
In Manage Categories, drag a category to reorder it, click its bin to delete it (its banks move to Other), or add one with an ID, a Label and one of ten colours, then click Done. Templates you create or duplicate and your word banks are saved automatically in Documents\ai_prompt_assistant\data, but changes made directly to a built-in template may be lost when the app restarts, so duplicate it first. Templates cannot be imported or exported. Only the AI features (Smart Terms, AI Generate, AI variants and the AI Tools) need a chat model, set up as in Choosing a model; everything else works offline.
Prompts
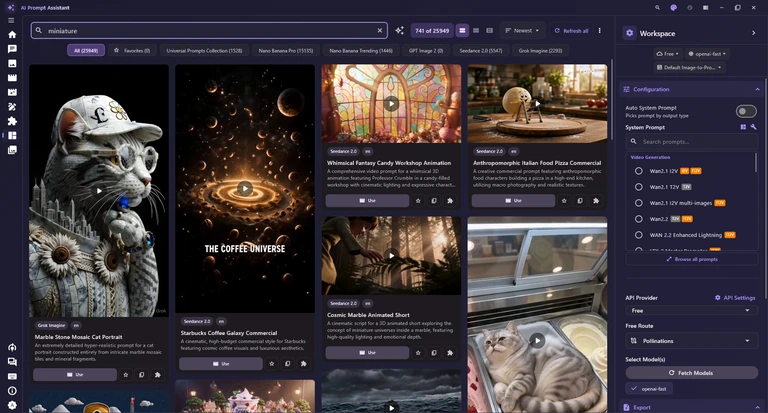
The Prompts tab is a library of ready-made prompts with example pictures and videos, drawn from a collection built into the app and from public prompt collections on the internet. Search it, keep favourites, and send any prompt to Image Studio, Video Studio or PromptFill. Open it from the navigation pane or with Ctrl8.
Search, sort and refresh

| Item | What it does |
|---|---|
| Search box | Filters as you type. It looks in titles, prompts, authors and tags, and also in descriptions, translations, sources and categories. |
| Smart multilingual search | The sparkle button (Enable smart multilingual search) turns smart search on or off, and the app remembers your choice. How it works is explained below the table. |
| Thumbnail size | Large thumbnails, Medium thumbnails or Small thumbnails change how many cards fit on the screen. |
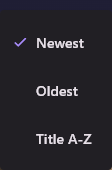
| Sort prompts | Newest (the default), Oldest or Title A-Z. Smart search results are ranked by how well they match first. |
| Refresh all | With All or Universal Prompts Collection selected, it fetches new prompts for all five online libraries; with one online library selected the button reads Refresh and updates only that one. A refresh only adds prompts. |
| Library actions | The three dots hold Rebuild library from scratch, for when one online library is selected. |
With smart search on, type in any language and press Enter. The app sends your search words to the chat AI provider and model chosen in the sidebar, which returns matching keywords in English, Chinese, Japanese, Korean and your own language; the library on your computer is then searched with them. A Matched terms: row shows those keywords, and each card gets a badge such as Strong match. If the AI fails or takes longer than 20 seconds, you see Smart search failed — using raw query. and an ordinary search runs instead.
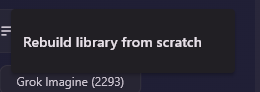
Rebuild library from scratch asks Rebuild library from scratch? and, if you click Rebuild, replaces your copy of the selected library with exactly what is online now, so prompts removed online disappear from your copy too. If the download fails, your old copy is kept.
Libraries and favourites


| Item | What it does |
|---|---|
| All | Shows prompts from every library together. |
| Favorites | Shows only the prompts you starred. It is an on/off filter on top of the selected library, and its number is how many favourites you have. |
| Universal Prompts Collection | Built into the app and never updated from the internet. It has category chips to narrow it down. |
| Nano Banana Pro | Image prompts from a public prompt collection on the internet, which the app downloads and keeps up to date. Selected by default. |
| Nano Banana Trending | Popular image prompts from a public collection on the internet. A starter copy comes with the app and is then updated online. |
| GPT Image 2 | Image prompts from a public prompt collection on the internet, which the app downloads and keeps up to date. |
| Seedance 2.0 | Video prompts from a public prompt collection on the internet. A starter copy comes with the app and is then updated online. |
| Grok Imagine | Video prompts from a public prompt collection on the internet. A starter copy comes with the app and is then updated online. |
The online libraries update themselves gently: the first time you open Prompts in a session, only the selected library is updated, and only if its last update is more than a day old. To update at any other time, click Refresh all or Refresh. Your copies of the libraries are kept on your computer, so searching them does not need a connection.
The online libraries are public community collections, and the app does not filter them. Some pictures may not suit every audience, so take care when browsing with others around. The screenshots in this manual use a neutral search word.
Prompt cards and details
Each card shows a preview, its library and language, a title and a short description. Hover over a video card to play a silent preview, and click the title to open the details. The buttons along the bottom act on that prompt.
| Item | What it does |
|---|---|
| Use | Puts the prompt text into Image Studio and opens it; video prompts go to Video Studio. On Universal cards with a picture, Use Image brings the picture in too and opens Image Studio in Image to Image mode. |
| Add to favorites | The star adds the prompt to Favorites; click it again to remove it (Remove from favorites). |
| Copy prompt | Copies the prompt text. |
| Send to PromptFill | The puzzle piece opens the prompt in PromptFill, where it arrives as Imported Prompt; AI Smart Split can then turn it into a template. |
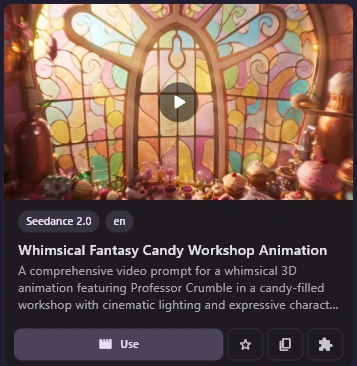
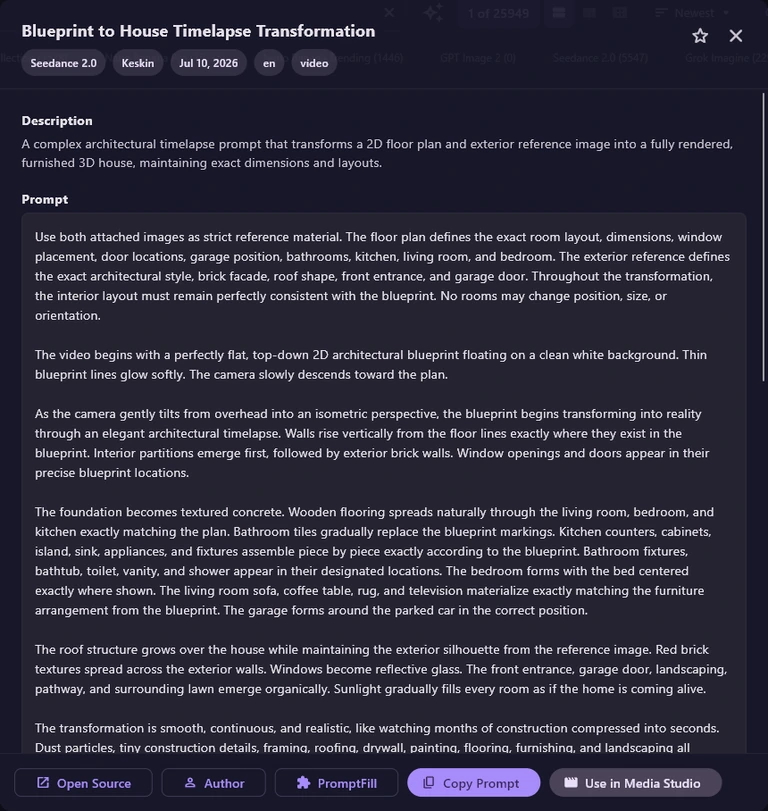
The details window shows chips for the library, author, date and tags, a star and a close button, then the Description, the full Prompt and, where available, a Translated Prompt and the example pictures or video. Each picture has Open, to view it full screen, and Download, to save it where you choose.
| Item | What it does |
|---|---|
| Open Source | Opens the page the prompt came from in your web browser. Shown only when there is a link. |
| Author | Opens the author's page in your web browser. Shown only when there is a link. |
| PromptFill | Sends the prompt to PromptFill. |
| Copy Prompt | Copies the full prompt text. |
| Use in Image Studio / Use in Media Studio | Sends the prompt to Image Studio; for a video prompt the button reads Use in Media Studio and opens Video Studio. For Universal prompts with pictures it reads Use Main Image and brings the picture in too. |
Bulk Analysis
Bulk Analysis runs a whole folder of pictures through an AI model and gives you a prompt or description for each, one picture after another. It uses the provider, the first ticked model and the system prompt chosen in the sidebar. Open it from the navigation pane or with Ctrl9.
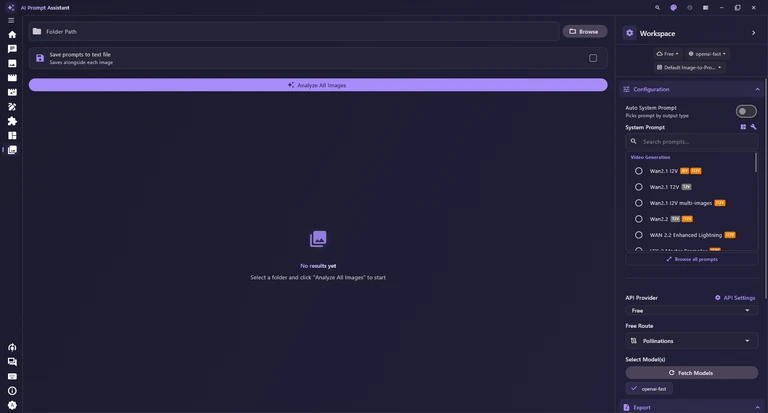
- In the sidebar, tick a model that understands images and pick the system prompt for the kind of text you want.
- Click Browse and choose the folder; the path cannot be typed. The app reports Found N images, counting PNG, JPG, JPEG, WEBP, GIF, BMP, TIF and TIFF files, subfolders included.
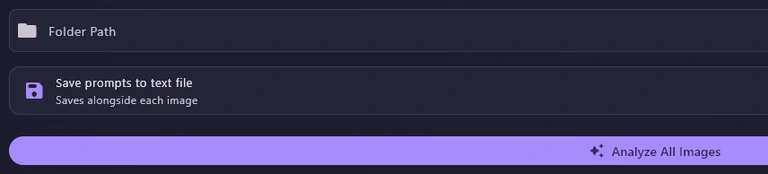
- Tick Save prompts to text file if you want a text file next to each picture (read the warning below first).
- Click Analyze All Images.
With Save prompts to text file on, the result for photo.png is written to photo.txt in the same folder. An existing .txt file with that name is replaced without asking, and pictures that share a name, such as photo.png and photo.jpg, overwrite each other's text file. If the folder's .txt files matter to you, work on a copy of the folder.
Results appear under Results (n) as cards, three per row, each with a number, the file name, the picture and its text, which you can select. The copy icon (Copy prompt) copies one result. If some pictures fail, the heading adds Errors (m) and a red box lists the first three. Results are shown only on screen, so turn on Save prompts to text file or copy the ones you need.
During a run the button shows Analyzing... X% with a progress bar, and Stop (or Esc) ends it early. At the end you see Analysis complete!, Analysis complete with N error(s) or, if you stopped it, Analysis stopped.
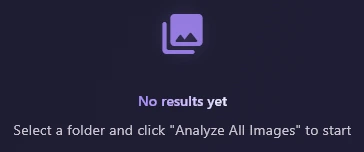
Every picture is sent to the chosen model with your system prompt and the request Describe this image in detail. The model must understand images, and the app does not check this first. The Free provider's default route could not read images in our tests, which is why the screenshots here show the screen before a run. Pick a suitable model: see Recommended models and Which provider and key to use.
Providers and API keys
A provider is the AI service that answers your requests. The app works with three kinds: the built-in Free provider, which needs no account; online providers such as Google or OpenAI, which need your own API key; and local providers that run the model on your own PC, such as Ollama or the built-in Local Enhancer. You pick the provider and the model in the sidebar, and Which features need a key? sums up what works where.
The Free provider
A fresh install starts on Free, whose card reads Free AI — no API key required. You need no account and no key. Free is not a program on your PC: your text travels over the internet to public free AI services, and they send the answer back. It is the quickest way to try Chat and the prompt helpers.
Free Route chooses which free service answers. It appears in the sidebar's Configuration section only while Free is the active provider, and again as Route on the Free card in API Settings. The model list depends on the route, so press Fetch Models after switching. A route other than Pollinations lasts only until you close the app: at the next start the app switches back to Pollinations, so choose your route again if you need it.
| Item | What it does |
|---|---|
| Groq | Sends your request through a free third-party relay to a Groq-hosted model. It may ask for paid credits or be unavailable; in our tests it asked for credits. |
| Ollama | Also goes through the free third-party relay. It is not your own Ollama program: to use Ollama on your PC, choose the Ollama provider instead (see local providers). |
| Pollinations | The default route. Sends your text to the free Pollinations service; it is the route that answered during our tests. |
| Nvidia | Goes through the free third-party relay to an NVIDIA-hosted model. It may ask for paid credits or be unavailable. |
| Gemini | Goes through the free third-party relay to a Gemini model. It may ask for paid credits or be unavailable. |
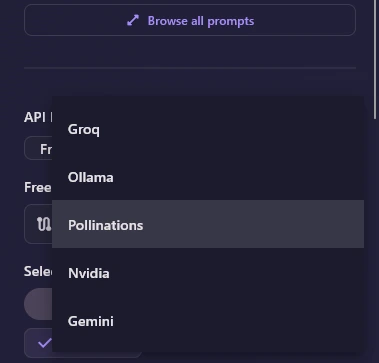
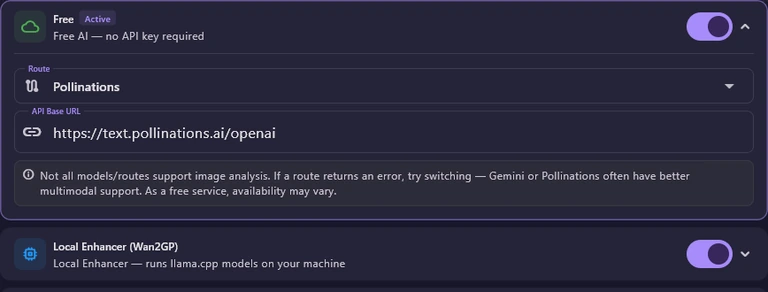
Treat Free as text only: in our tests it could not read attached images, and it cannot read videos. There is no free video generation at all. Free pictures do exist, but in Image Studio, which has its own Free provider with Flux models. Free services are shared and public, so they can be slow or busy, and whatever you send goes to those third-party services, so keep private material out.
Choosing a provider and a model
The chips at the top of the sidebar are the quick way. The Provider chip opens the API Provider list with every provider that is switched on in API Settings; click one. The Model chip shows the ticked model (with +N when more are ticked) or No model, and opens the Models dialog for the current provider. On a fresh install no model is ticked, so tick one before your first message. The same choices sit in Configuration as API Provider and Select Model(s) with Fetch Models.
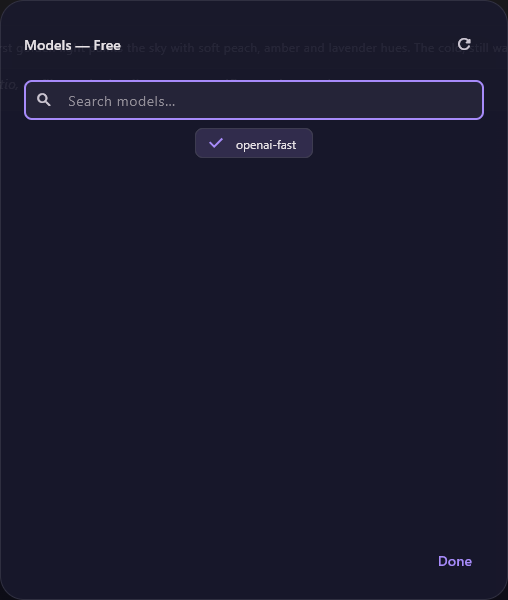
| Item | What it does |
|---|---|
| Refetch | The round-arrow button at the top right. It asks the provider for its model list again, for example after you download a new model in Ollama. |
| Search models… | Narrows the list as you type. No models found means nothing matches. |
| Done | Closes the dialog. Your ticks are kept, and each provider remembers its own. |
You can tick several models. In Chat each ticked model answers the same message in turn, so you can compare them. Tasks that use one model, such as Improve Prompt in Image Studio, SVG Studio, Bulk Analysis, Storyboard analysis and the Co-Creator, use only the first ticked one. Online providers without a key still show a built-in model list, but nothing answers until you add the key.
API Provider Settings
Open it with API Settings in the sidebar's Configuration section. Each provider has a card with its name, a short description and a switch; the switch only decides whether the provider appears in the sidebar and the Provider chip, and at least one must stay on. The current provider carries an Active badge. Click a card to expand it: a link button (such as Get API Key, Get OmniRoute, Download … or Open …) opens the provider's website, and the fields below hold its key and address. Every change is saved at once; there is no Save button.
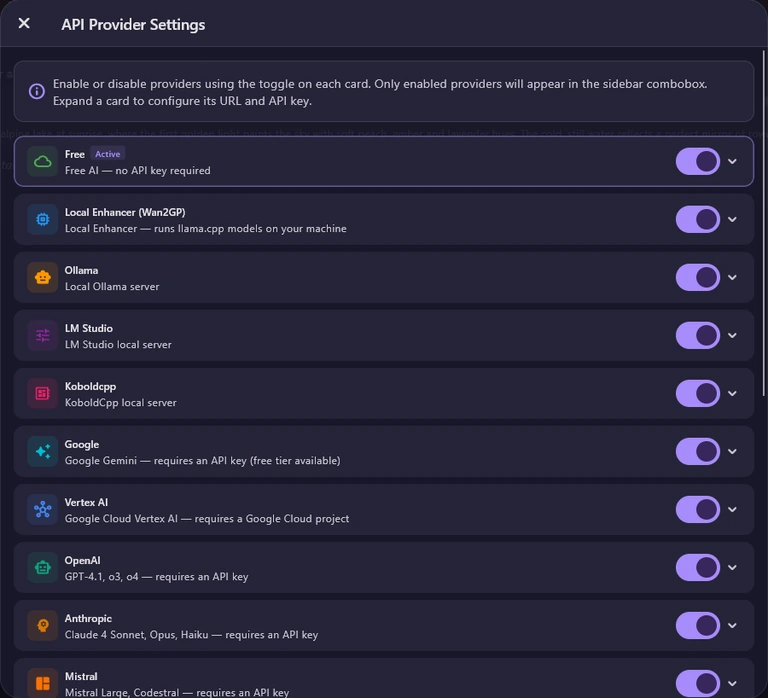
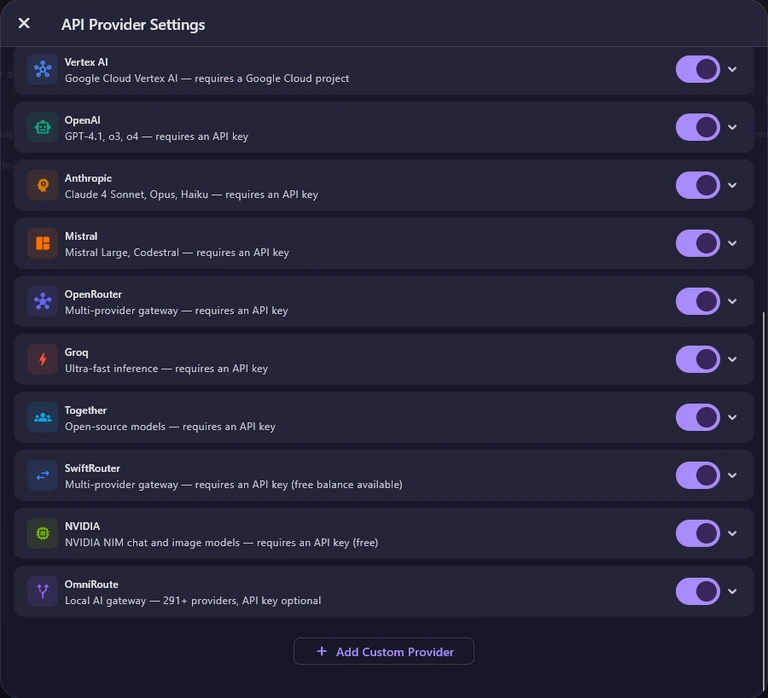
| Provider | What it asks for | What it is good for |
|---|---|---|
| Free | Nothing: no account and no key, just a Route choice. | Trying the app, text chat and prompt writing. See the Free provider. |
| Local Enhancer (Wan2GP) | No key. The model and engine download on first use; options are under Advanced Wan2GP Settings. | Private, offline chat that can read images and video, on a PC with an NVIDIA graphics card. See Local Enhancer. |
| Ollama | No key; the address of your Ollama program (default http://localhost:11434) and Keep Alive, how long Ollama keeps the model in memory after an answer (the preset -1 keeps it loaded, 0 unloads it at once). | Free models you download and run yourself, including vision models from Recommended Models. |
| LM Studio | No key; the address of LM Studio's local server (default http://localhost:1234) and Unload model after response. | Running models you browse and load in the LM Studio program, all on your PC. |
| Koboldcpp | No key; the address of KoboldCpp (default http://localhost:5001). | Running a model file you load in KoboldCpp on your own PC. |
| An API key (a free tier is available), plus Thinking Level, Enable Google Search grounding and Disable safety filters. | A strong all-rounder: Gemini chat that reads images, videos and PDF files, Nano Banana images and Veo videos. | |
| Vertex AI | An API Key / OAuth Token and a Google Cloud project: replace YOUR_PROJECT_ID (and the region if needed) in the API Base URL. The card also has a Thinking Level list (None, Low, Medium or High) and two tick boxes: Enable Google Search grounding adds live web search to answers, and Disable safety filters turns off Google's content filters for this provider. | The same Google models, plus Imagen 4 images, billed through your Google Cloud account. |
| OpenAI | An API key. | GPT chat models, GPT Image pictures and Sora videos. |
| Anthropic | An API key. | Claude chat models (Sonnet, Opus, Haiku) for chat and prompt writing. |
| Mistral | An API key. | Mistral chat models, and pictures through Mistral Medium + Image Tool in Image Studio. |
| OpenRouter | An API key. | One key for many models from different companies: chat, pictures and some video models. |
| Groq | An API key. | Very fast chat answers. |
| Together | An API key. | Open-source models for chat, FLUX pictures and a few video models. |
| SwiftRouter | An API key. The sign-up link on the card includes a referral code. | A paid online gateway: one key for many AI models, with some free starting balance. |
| NVIDIA | An API key, which NVIDIA gives for free. | NVIDIA-hosted chat models, and FLUX and Stable Diffusion pictures in Image Studio. |
| OmniRoute | Usually no key (API Key (optional)); the OmniRoute program must be installed and running on your PC (default http://localhost:20128). | One local doorway to many AI providers, with automatic choices such as Auto — Balanced or Auto — Fast. |
Adding an API key
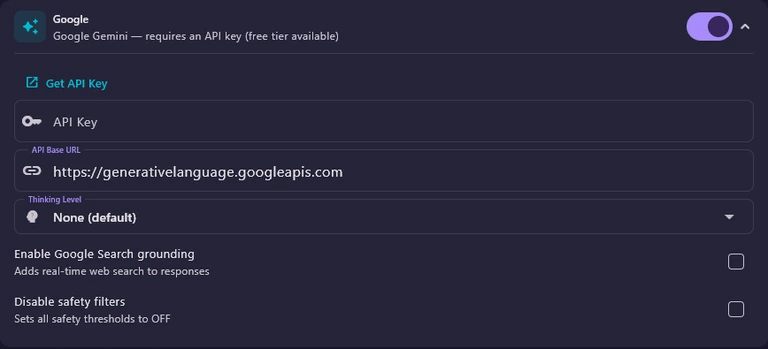
- Open API Settings in the sidebar's Configuration section.
- Click the provider's card to expand it, then click Get API Key to open the provider's website, sign in and create a key there. For Google, Recommended Models has a Get API Key button too.
- Paste the key into the card's API Key field. The characters stay hidden, and the key is saved at once.
- Close the dialog. The provider can now be used: pick it with the Provider chip and tick a model. In Image Studio its (set key) label disappears.
Keys are stored unencrypted in the app's settings, inside Documents\ai_prompt_assistant on this computer; only the on-screen field hides them. Each key is sent only to its own provider, and feedback and crash reports strip keys out first. Delete All Data does not remove keys: to remove one, clear its API Key field. Never share a screenshot of a filled-in key field.
Adding a custom provider
Use Add Custom Provider, under the last card, to connect any service that follows the same rules as OpenAI's chat service; the dialog calls this OpenAI-compatible, and many local AI servers and online gateways are. The new provider appears in the sidebar at once. Its card has API Key (for services that need one) and API Base URL fields, and a bin button, Delete custom provider, that removes it after asking.
| Item | What it does |
|---|---|
| Provider Name | Any name you like, such as My Local Server. It is required and must differ from the other providers' names. |
| Base URL | The service's address; the field starts as http://localhost:8080. Use the address the service's own instructions give. |
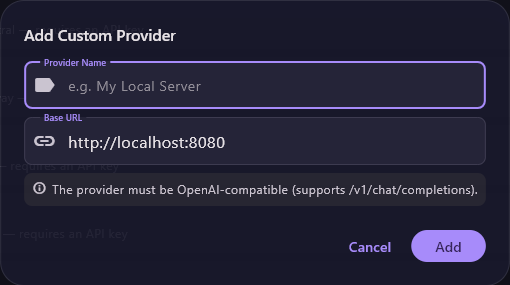
Local providers: Ollama, LM Studio and Koboldcpp
Ollama, LM Studio and Koboldcpp are free programs that run AI models on your own PC. The app talks to them over a local address, so no key is needed and your text stays on your computer, but the program must be running. To read images, the model you load must be a vision model; Recommended Models suggests some.
- Install the program. Its card in API Settings has a Download … link to its website, for example Download Ollama.
- Start it and get a model: in Ollama run an ollama pull command; in LM Studio download and load a model, then start the local server on its Developer tab; in KoboldCpp launch it and load a model file.
- Choose the provider with the Provider chip. If you changed the program's port, correct the API Base URL on its card (defaults: Ollama http://localhost:11434, LM Studio http://localhost:1234, Koboldcpp http://localhost:5001).
- Press Fetch Models (or open the Model chip) and tick a model. If the app cannot connect, it shows Connection failed with steps to fix it and a download link.
Local Enhancer
Local Enhancer (Wan2GP) is built into the app: it downloads an AI model and a small engine, then runs them on your own PC. After those one-time downloads it works without internet, your prompts and images stay on your computer, and you need no key and no other program. Its models read images, and all but JoyCaption read video too, so Attach Video in Chat works with it; Google is the only other provider that offers it. It cannot be used in SVG Studio.
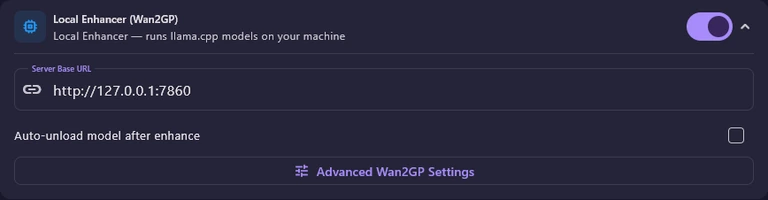
Choose Local Enhancer as the provider, tick a model and send a message. The very first time you do (in Chat or Bulk Analysis), a Local Enhancer Runtime dialog offers the one-time engine download of about 50 MB: Download Runtime installs it, and Skip closes the dialog without sending anything; it comes back the next time you use Local Enhancer. Next, if the chosen model is not downloaded yet, the Load Model dialog names it: Load downloads the missing files from Hugging Face and starts the model, and Cancel stops without downloading anything. You then see Loading Model, followed by Model Ready or Failed to Load Model.
Each model is typically 2–17 GB, so allow time and disk space. By default the files go to AppData\Local\ai_prompt_assistant\local_enhancer in your Windows user folder. Once the files are on your PC, loading starts straight away; closing the app unloads the model.
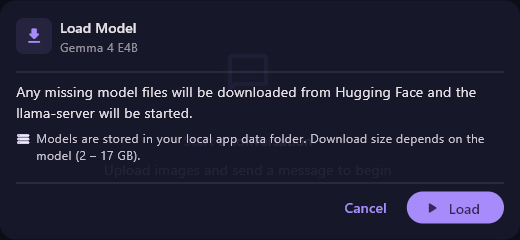
Local Enhancer Settings
Open the Local Enhancer (Wan2GP) card in API Settings and click Advanced Wan2GP Settings. The table below explains every option. Nothing changes until you click Save; Cancel throws your changes away. The Download storage location section is not pictured because it shows personal folders.
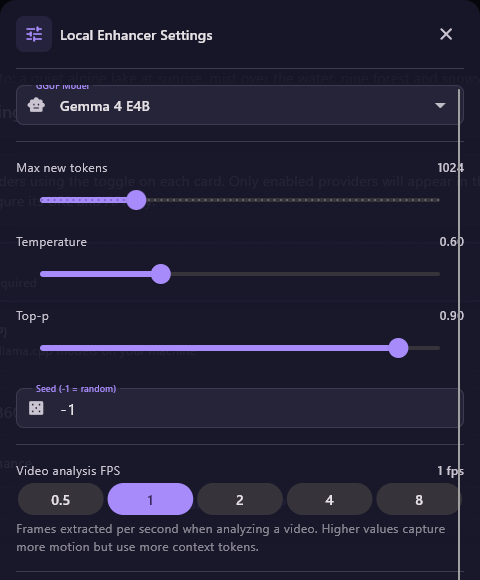
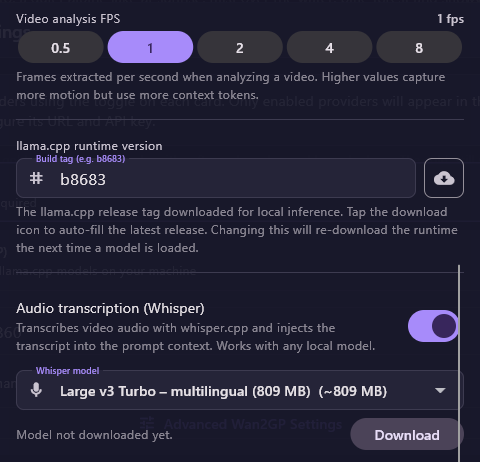
| Option | What it does | Default |
|---|---|---|
| GGUF Model | The model file to run. Choices include Gemma 4, Qwen3.5 and Llama JoyCaption Beta One (images only); the small 4B and E4B models need far less graphics memory than the 26B ones. | Gemma 4 E4B |
| Max new tokens | The longest answer the model may write, from 64 to 4096 tokens (word pieces). | 1024 |
| Temperature | How creative or random the answers are, from 0.00 to 2.00. Lower is steadier, higher is more varied. | 0.60 |
| Top-p | How wide a choice of words the model considers, from 0.00 to 1.00. | 0.90 |
| Seed (-1 = random) | A fixed number repeats the same result for the same request; -1 gives a different result each time. | -1 (random) |
| Video analysis FPS | How many frames per second are taken from an attached video: 0.5, 1, 2, 4 or 8. Higher values catch more motion but use more of the model's memory. | 1 frame per second |
| llama.cpp runtime version | The version of the engine that runs the model. The cloud button fills in the newest one; a change downloads the engine again the next time a model loads. | b8683 |
| Audio transcription (Whisper) | Turns the speech in an attached video into text and adds it to your request. Works with any local model. | Off |
| Whisper model | Tiny (77 MB), Base (142 MB) and Small (466 MB) understand English only; Large v3 Turbo (809 MB) is multilingual. Storyboard uses the same choice. | Large v3 Turbo – multilingual (809 MB) |
| Download | Downloads the chosen Whisper model and what it needs to run. The status line changes from Model not downloaded yet. to Model ready., and the button becomes Reload. | Not downloaded |
| Download storage location | Where models and the engine are saved: AppData (default), App installation folder or Custom path. Changing it does not move files you already have; Whisper files always stay in the AppData folder. | AppData (default) |
| Enable thinking mode | Lets the model reason step by step before it answers, which takes longer. Greyed out when the chosen model does not support it. | Off |
Local Enhancer downloads the NVIDIA version of its engine and loads the whole model onto the graphics card, so in practice it needs an NVIDIA graphics card. The app gives no memory figure: the small models (4B and E4B) take a few GB, the 26B models far more. Without a suitable card, use Ollama or LM Studio, the Free provider or an online provider instead.
Recommended Models
Recommended Models in the navigation pane opens Recommended Vision Models: models that can read images, which you need for describing pictures, Bulk Analysis and Storyboard analysis. Each card shows the graphics memory it needs and a short description: Llama JoyCaption Alpha One (12GB+), Gemma 3 27B (24GB+), Gemma 3 12B (8GB+), Gemma 3 4B (4GB+), Qwen2.5-VL-7B (8GB+) and LLaVA 1.6 (8GB+).
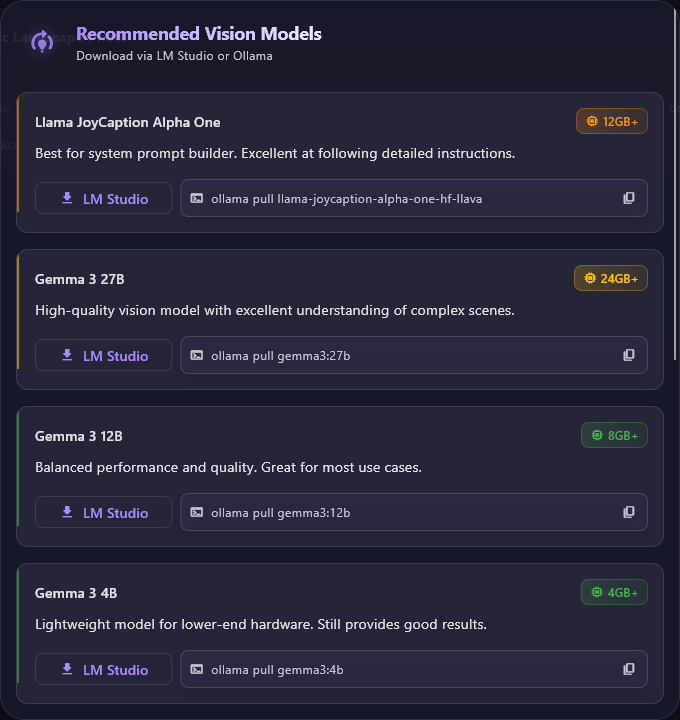
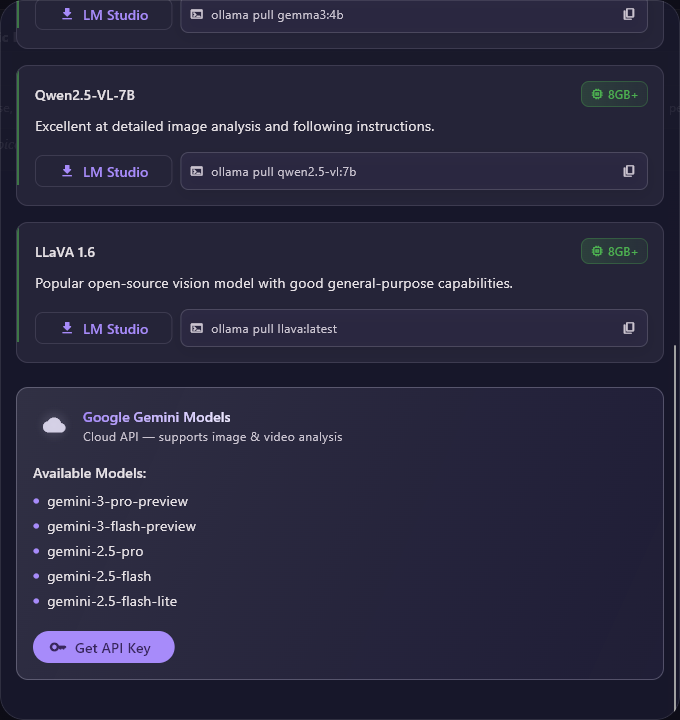
- LM Studio opens LM Studio's website. Install the program, then find and load the model inside it (see local providers).
- The Ollama box shows a ready-made command such as ollama pull gemma3:12b. Click its copy button (Copied to clipboard), paste it into a terminal window such as Command Prompt or PowerShell on a PC with Ollama installed, and press Enter to download the model.
- Google Gemini Models run online and read images and video: gemini-3-pro-preview, gemini-3-flash-preview, gemini-2.5-pro, gemini-2.5-flash and gemini-2.5-flash-lite. Get API Key opens Google's key page; paste the key into the Google card in API Settings.
Which features need a key?
A quick guide to what works on the Free provider and what needs more. Where the table says chat provider, the feature uses the provider and first ticked model in the sidebar, so a local provider works too.
| Feature | Works with Free? | What you need otherwise |
|---|---|---|
| Chat | Yes, for text. | Any provider with a ticked model; to read images, a vision model. |
| Improve Prompt, JSON Enhance, Surprise Me | Yes. | Any chat provider with a ticked model. Preserve Face Prompt also needs a vision model. |
| Image generation | Yes: the Flux models in Image Studio, text to image only. | A key for Google, Vertex AI, OpenAI, Together, OpenRouter, Mistral or NVIDIA, or a running OmniRoute. |
| Video generation | No. | A key for Google Veo, Vertex AI, OpenAI Sora, Together or OpenRouter, or a running OmniRoute. See Video Studio. |
| SVG Studio | Partly: the code is written, but the preview may not appear. | A stronger chat model from any provider except Local Enhancer. |
| Reading images and video (image-to-prompt, Bulk Analysis, Storyboard analysis) | Not reliably: the default route could not in our tests. | A vision model, for example Google, Local Enhancer, or Ollama or LM Studio with a recommended model. Attached videos: Google or Local Enhancer only. |
| Smart multilingual search | Yes, as a text task. | Any working chat provider; if it fails, the app searches with your words as typed. |
| Prompt Director | Yes. | Nothing: it builds the prompt on your PC without AI. |
| PromptFill | Yes. | Nothing for templates and word banks; the AI tools use the chat provider. |
| Prompt libraries | Yes. | Only an internet connection to download and update them. See Prompts. |
System prompts
A system prompt is a set of standing instructions sent with every request. It tells the model what kind of answer to give, for example: turn this image into a video prompt for a particular video model. The app comes with 198 built-in system prompts in 25 categories, many written for a specific image or video model. You can pick one yourself, let Auto System Prompt choose, or build your own with the Prompt Builder.
The third chip at the top of the sidebar shows the current system prompt, or Auto. Click it for the System Prompt list: prompts grouped by category, with a Search prompts… box at the top. Click a name to use it, or Cancel to close. The same list sits under System Prompt in Configuration, where coloured badges show each prompt's input and output: orange for image input, blue for video, purple for audio and grey for text.
Your choice is remembered. While Auto System Prompt is on, the sidebar list is greyed out, so turn Auto off first to choose yourself. Some prompts come with ready-made example prompts that appear as chips in Chat. To read a prompt before you use it, open the System Prompt Browser.
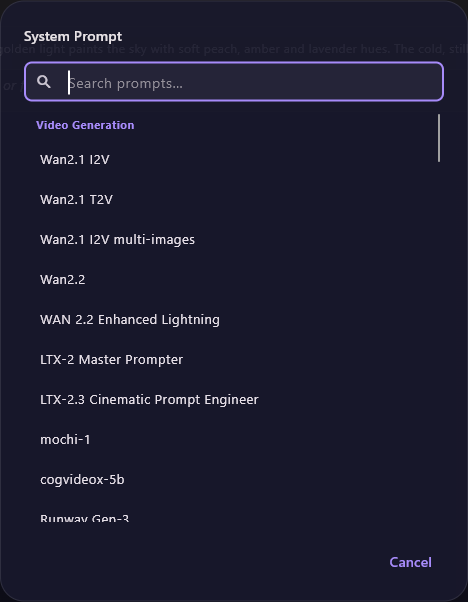
Auto System Prompt
The Auto System Prompt switch (Picks prompt by output type) is on in a fresh install. The app then picks a built-in prompt from what you attach and the Image / Video toggle: with text only it writes a text-to-image or text-to-video prompt, with an image attached an image-to-image or image-to-video prompt, and with a video attached a video-to-image or video-to-video prompt. The system prompt chip shows Auto, the prompt list is greyed out and the example chips are hidden.
The Image / Video toggle appears only while Auto is on and says what you want to make; the Co-Creator follows it too. The browser still opens, but warns that Auto will override your choice when you send. To use a prompt of your own choosing, switch Auto off.
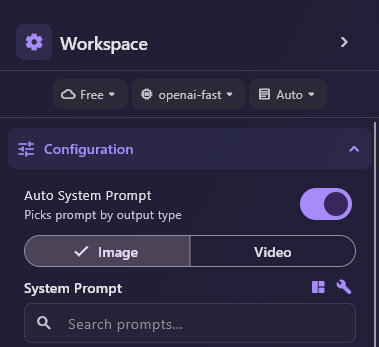
The System Prompt Browser
The browser shows every system prompt with its full text and details. Open it with Browse all prompts or the mosaic icon beside System Prompt in Configuration. The header counts the prompts and categories, and the counter at the top right shows how many match your search and filters, for example 198 of 198. It works without internet.
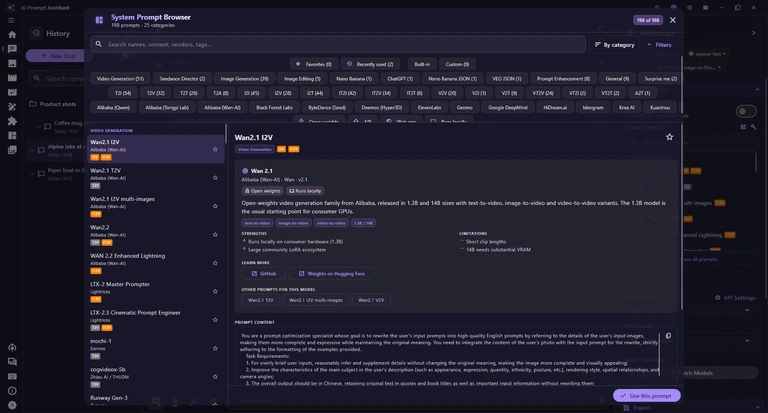


| Item | What it does |
|---|---|
| Search names, content, vendors, tags… | Finds prompts by name, text, vendor or tag as you type. |
| Sort | By category, Name (A–Z), Recently used or Best match (the closest to your search first). |
| Filters | Shows rows of filter chips for categories, I/O types, vendor and access. The button reads Filters (n) while some are on; Clear filters resets them. |
| Favorites | Only the prompts you starred; the number shows how many. |
| Recently used | The last 30 prompts you used. |
| Built-in | Only the prompts that came with the app. |
| Custom | Only the prompts you saved in the Prompt Builder. |
The list on the left is grouped by category. Each row shows the prompt's name, the company behind its target model, coloured input/output badges such as I2V or T2V, and a star. Click a row to see its details on the right.
Two filters describe the model a prompt is written for. Vendor is the company or community behind that model, for example Alibaba (Wan-AI) or Lightricks. Access says how the model can be used: Open weights (the model can be downloaded), API (an online service with a key), Web app (a website) or Runs locally (on your own PC). These two filters only show prompts that carry model information.
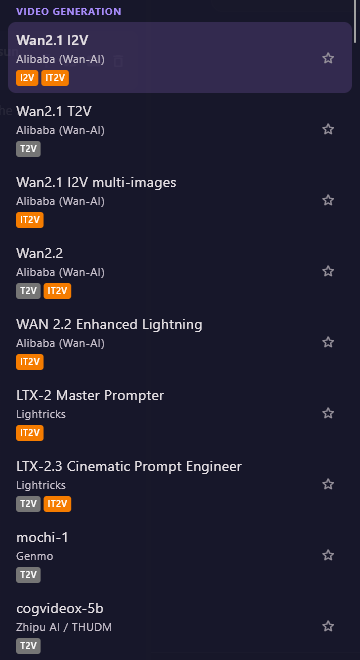
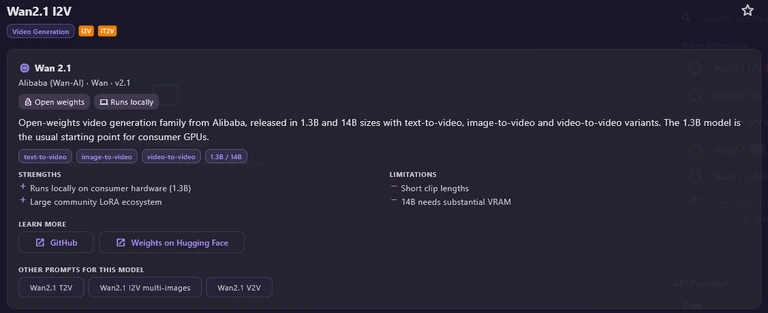
For prompts written for a particular model, a model card shows that model's maker, version and access, a short description, Strengths and Limitations, Learn more links that open in your web browser, and Other prompts for this model. Below it, Prompt content shows the full instructions and Example inputs shows sample requests.
| Item | What it does |
|---|---|
| Add favorite | The star at the top right of the details. Click again (Remove favorite) to take it off; starred prompts appear under Favorites. |
| Copy prompt | Copies the full prompt text (Prompt copied), for example to use it in another program. |
| Use this prompt | Makes it the active system prompt and closes the browser. Custom prompts also have Delete this custom prompt, which asks Delete prompt? first. |
The System Prompt Builder
Open it with the wrench icon (Open Prompt Builder) beside System Prompt in Configuration. The builder writes a system prompt for describing images, from the choices you tick, entirely on your PC and without AI. Use the result with a vision model to turn pictures into captions or prompts in the style you want. Options are on the left; your saved prompts, the prompt text and the save box are on the right.
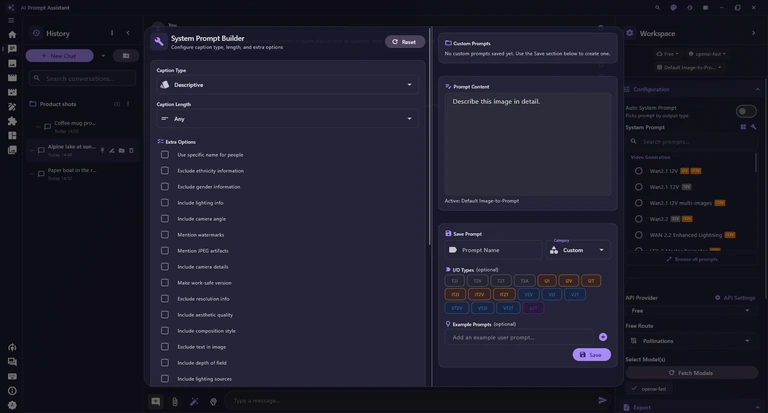
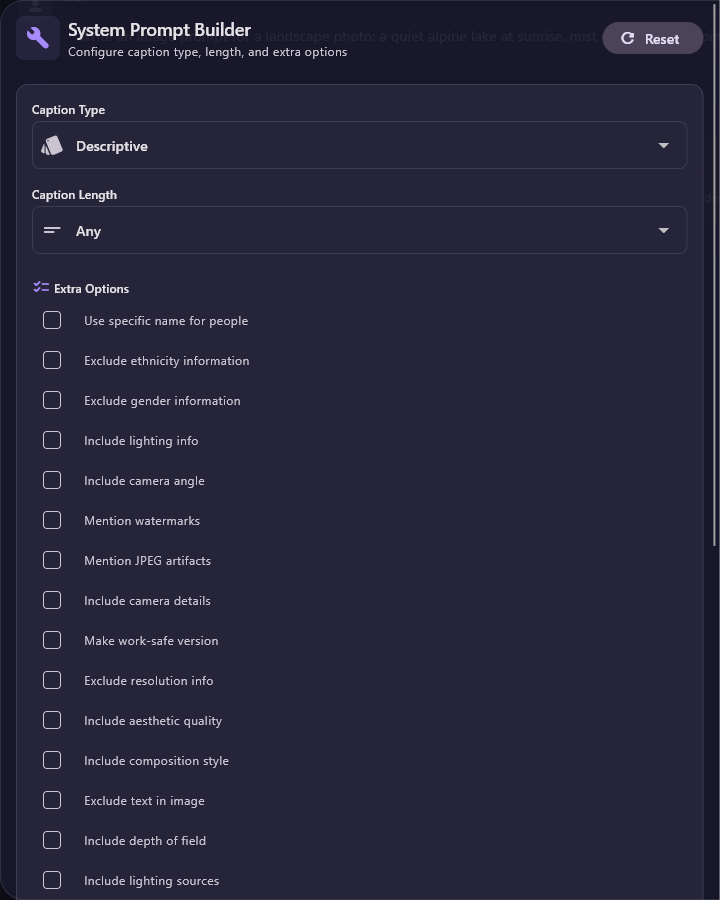
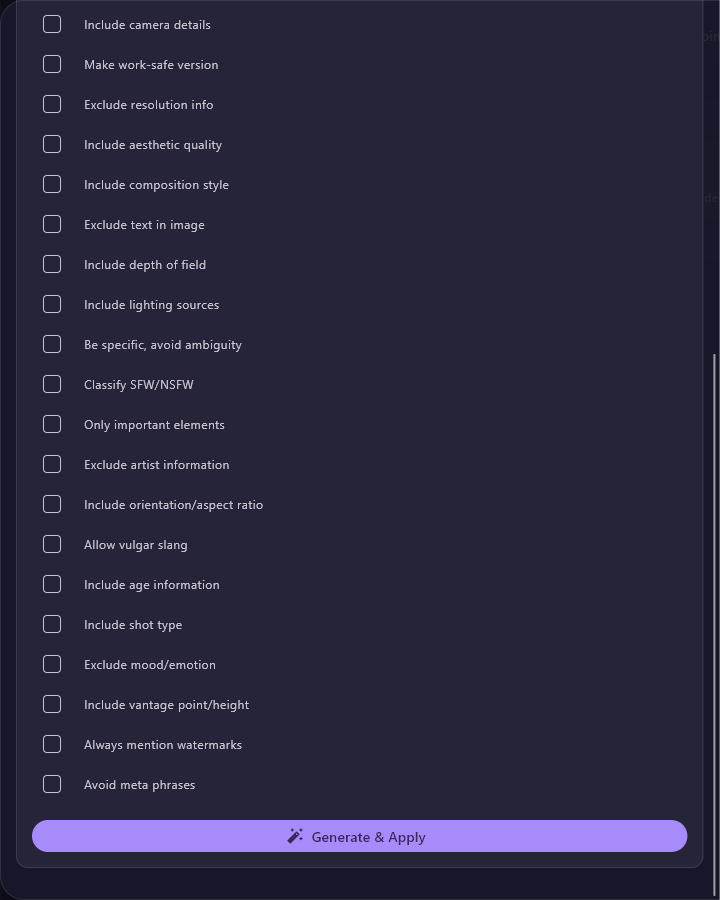
| Item | What it does |
|---|---|
| Reset | Returns the options to Descriptive, Any length and no extras. |
| Caption Type | The style of description, such as Descriptive, Descriptive (Casual), Straightforward, Stable Diffusion Prompt, MidJourney, Art Critic, Product Listing, Social Media Post, or one of several tag-list styles. |
| Caption Length | Any, Very Short to Very Long, or a word count from 20 to 260 words. |
| Extra Options | About 27 tick boxes that add instructions, such as Include lighting info, Include camera angle, Exclude text in image or Make work-safe version. Use specific name for people adds a Name for people in image box. |
| Generate & Apply | Writes the prompt into Prompt Content and makes it the active system prompt for now (Prompt generated and applied!). It is not saved unless you use Save. |
| Custom Prompts | Select Custom Prompt loads one of your saved prompts for editing; — New Custom Prompt — clears the editor. Until you save one, it reads No custom prompts saved yet. |
| Prompt Content | The text of the active system prompt, which you can edit freely. The line below it shows Active: and the prompt's name. |
The Save Prompt box stores the text in Prompt Content as your own custom prompt, so it appears in the sidebar list and under Custom in the browser. Custom prompts are kept in Documents\ai_prompt_assistant\data on this computer.
| Item | What it does |
|---|---|
| Prompt Name | The name shown in the lists. Saving under the name of one of your custom prompts replaces it. |
| Category | The group it is listed under: any existing category, or Custom. |
| I/O Types | Optional codes for what goes in and what comes out: T = text, I = image, V = video, A = audio; letters before the 2 are the input, after it the output. IT2V means image plus text in, video out. They drive the badges and filters. |
| Example Prompts | Optional sample requests; type one and click + to add it. They become the example chips in Chat. |
| Save | Saves the prompt (Prompt saved!). |
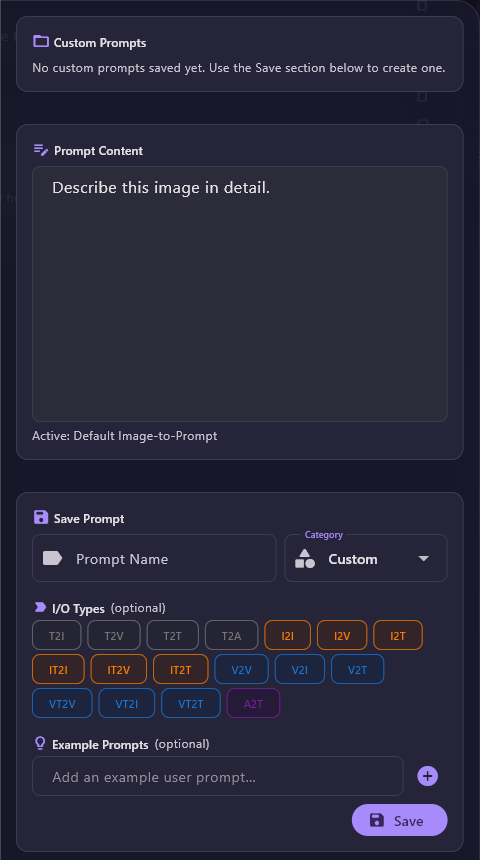
To change a custom prompt later, pick it under Custom Prompts, edit it and save it under the same name. To delete one, open the System Prompt Browser, click Custom, select the prompt and use Delete this custom prompt. Delete All Data does not remove custom prompts.
Appearance
Two settings change how the app looks: the mode (light, dark or following Windows) and the colour palette. Both apply at once.
Light, dark or system
The last item of the navigation pane shows the current mode. Each click moves on: Theme: System follows the light or dark setting of Windows, then Theme: Light, then Theme: Dark, and back to System.


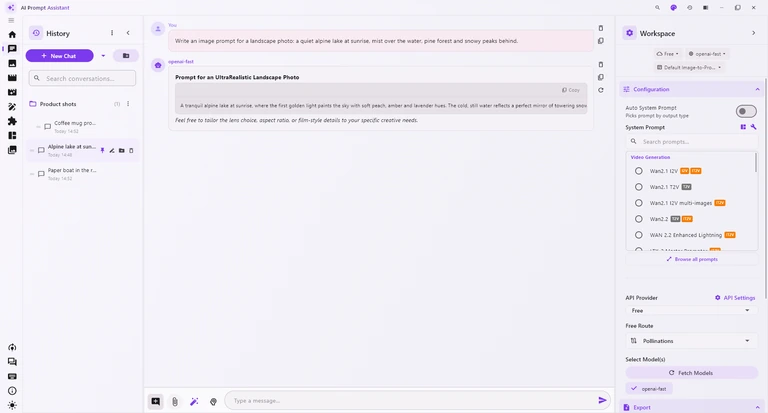
Colour palettes
Click the palette button in the title bar (Choose theme) and pick one of ten palettes. Each palette has a light and a dark variant and follows the mode above.
- Stitch Purple (the default), Ocean Blue, Forest Green, Sunset Orange, Rose Pink, Slate Gray and Corporate Blue change the accent colour and the tint of the backgrounds.
- High Contrast uses pure white with black text in light mode and pure black with white text in dark mode, with a strong blue accent. It is the app's own palette, not the Windows high-contrast mode.
- AMOLED Black is pure black only in dark mode; in light mode it looks like Stitch Purple.
- Windows 11 uses Windows-style grey surfaces and a fixed Windows blue. It does not pick up your personal accent colour from Windows.
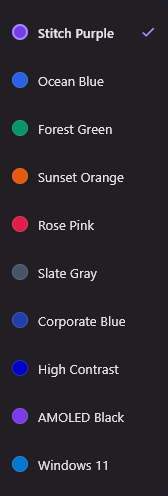

The app remembers both choices and uses them the next time you start it.
Keyboard shortcuts
Open the list inside the app with Keyboard Shortcuts at the bottom of the navigation pane, Ctrl/ or F1. Shortcuts are ignored while a dialog is open. Esc stops a running job in Chat, Bulk Analysis, Image Studio, Video Studio, SVG Studio and Storyboard; when nothing is running it does its usual job.
| Keys | What it does |
|---|---|
| Anywhere in the app | |
| CtrlK | Search everything (command palette) |
| Ctrl1 … Ctrl9 | Switch tabs, from Home to Bulk Analysis (number-pad digits work too) |
| CtrlN | New chat or session (Chat, Image Studio, Video Studio) |
| CtrlH | Show or hide the History panel |
| CtrlB | Collapse or expand the Workspace sidebar |
| Ctrl/ or F1 | Open the Keyboard Shortcuts dialog |
| Esc | Stop generating (Chat, Bulk Analysis, Image, Video, SVG, Storyboard) |
| Chat message box and studio prompts | |
| CtrlEnter | Send message |
| ShiftEnter | New line |
| Enter | New line; sends instead when Send message with Enter is on |
| Enter | Generate, in the Image, Video and SVG Studio prompt boxes |
| Search everything and History | |
| ↑ ↓ Enter Esc | Move through, open and close the command palette |
| Ctrl+click / Shift+click | Select several history items, or a range (Recent view) |
| Storyboard timeline | |
| Space | Play or pause |
| K | Pause |
| L | Play forward; press again for 2x, then 4x |
| J | Shuttle backward |
| ← → | Step one frame (moves the selected cut) |
| Shift← Shift→ | Step ten frames |
| Page Up Page Down or ↑ ↓ | Previous or next cut |
| Home End | Start or end of the video |
| S | Split at the playhead |
| M | Merge the selected shot with the next one |
| Delete or Backspace | Remove the selected cut |
| CtrlZ CtrlY | Undo or redo |
| P | Loop the selected cut in the preview |
| Ctrl + mouse wheel | Zoom the timeline |
| ? | Show the timeline shortcuts list |
| Enter ShiftEnter Esc | Confirm, new line or cancel while editing text on the storyboard sheet |
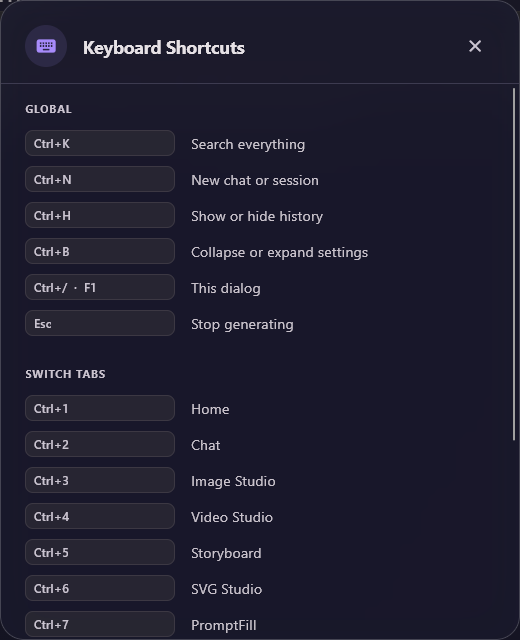
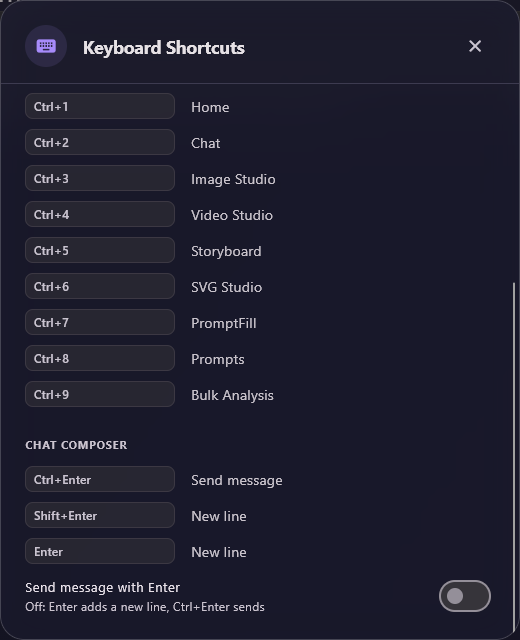
The Send message with Enter switch lives only in the Keyboard Shortcuts dialog. Off (the default), Enter adds a new line and CtrlEnter sends. Turn it on and Enter sends; ShiftEnter always adds a new line and CtrlEnter always sends. The app remembers your choice.
Your data and privacy
AI Prompt Assistant keeps your work on your own computer. This chapter shows where each kind of file goes, how to export a chat, what the two delete buttons really remove, and exactly when the app goes online.
Where your files are kept
There is no account and no cloud sync: everything stays on this PC, in four places.
- Your Documents folder: Documents\ai_prompt_assistant holds your settings (including API keys), chats and studio history, custom system prompts, favourites, downloaded prompt libraries, Storyboard projects, PromptFill templates and word banks, and problem reports. It also keeps copies of the images and videos you attach in Chat.
- The Windows temporary folder: pictures and videos made in Image Studio and Video Studio are kept there until you press Save. Windows clean-up tools can empty that folder, so save anything you want to keep.
- Your Windows user profile: downloaded engines and models go to two app folders inside the hidden AppData folder. The Local Enhancer engine and models and Whisper for speech go to AppData\Local\ai_prompt_assistant; FFmpeg and the scene-detection model go to AppData\Roaming\com.example\ai_prompt_assistant. For the Local Enhancer you can choose another place under Download storage location.
- Wherever you choose: files you Save or export (pictures, videos, SVG files, storyboard sheets, cut lists) go to the folder you pick in the Save dialog.
Export a chat
The Export section of the sidebar appears only when the current chat has messages. It has one button for each format:
| Item | What it does |
|---|---|
| .txt | Readable text: each message on a USER: or ASSISTANT: line, with the name of the model that answered. |
| .json | The full conversation in a structured form that other tools can read, including details such as where the attached images are stored. |
Neither button saves a file by itself. The text goes to the Windows Share window: share it to an app such as Notepad, OneNote or Mail to keep it. On older versions of Windows an e-mail draft opens instead.
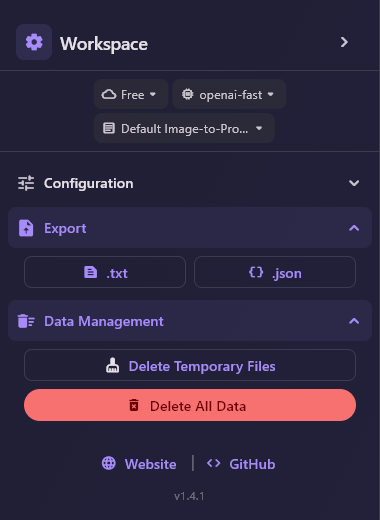
Delete data
The Data Management section at the bottom of the sidebar has two buttons. Both ask before doing anything, and neither can be undone.
| Button | What it removes | What it keeps |
|---|---|---|
| Delete Temporary Files | The copies of images and videos you attached in Chat. Old chats can then no longer show those attachments. | Every chat with all its text, and everything else in the app. |
| Delete All Data | All chats, all Image Studio and Video Studio sessions, their history folders, and the temporary uploads. | Settings and API keys, custom system prompts, favourites, prompt libraries, PromptFill templates, Storyboard projects, problem reports, downloaded models, and generated pictures still in the temporary folder. |
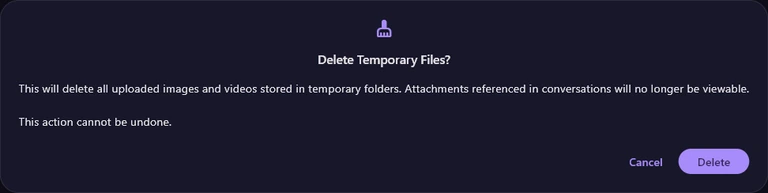
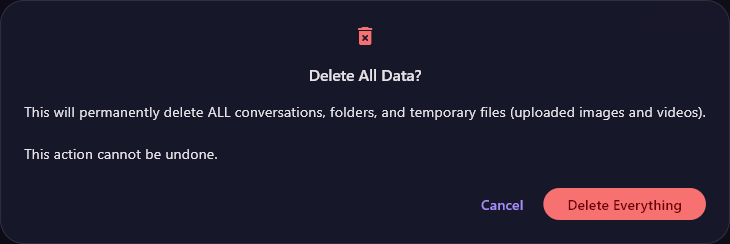
Delete All Data keeps your API keys. To remove everything, uninstall the app and then delete the Documents\ai_prompt_assistant folder yourself. Downloaded engines and models stay in the two AppData folders listed under Where your files are kept until you delete those too.
What goes online
The app runs on your PC, but some features need the internet:
- Your AI provider: what you type and attach is sent only to the provider you chose: the one in the sidebar, or the one picked in Image Studio's or Video Studio's own Provider list. With Free it goes to third-party free services on the internet; with a local provider it stays on your PC.
- Libraries and downloads: the Prompts libraries download from GitHub and youmind.com, and example images on Home and in the libraries load from the web. One-time downloads (FFmpeg, the Local Enhancer engine and models, Whisper and the scene-detection model) come from GitHub and Hugging Face.
- Update check: once per start the app reads a small version file on the internet to see whether a newer version exists. Nothing about you is sent beyond an ordinary web request. See Updates.
- Feedback: a message or problem report is sent only when you press Send in Send feedback.
- Links: App Page, More Free Apps, and the Website and GitHub links in the sidebar open your web browser.
Local providers once they are set up (Local Enhancer, Ollama, LM Studio, KoboldCpp), your history and its search, Prompt Director, PromptFill without its AI tools, the System Prompt Browser and Prompt Builder, and prompt libraries you have already downloaded.
Feedback and problem reports
Tell the developer about a bug, suggest an idea or rate the app without leaving it. Click Send Feedback at the bottom of the navigation pane. Your message goes to PixeoAi's website over the internet, not by e-mail.
- Under What is this about? choose General message, Feedback or suggestion, Rate the app, Report a bug or Crash report.
- For Rate the app, click a star under Your rating.
- Write a Subject (a short summary) and the Details. The counter under each box shows how many characters are left.
- If you would like an answer, fill in Your name (optional) and Reply email (optional). For a problem, also turn on Include technical diagnostics.
- Press Send. A Thank you message confirms it and shows a Reference; quote it if you get in touch about the same issue.
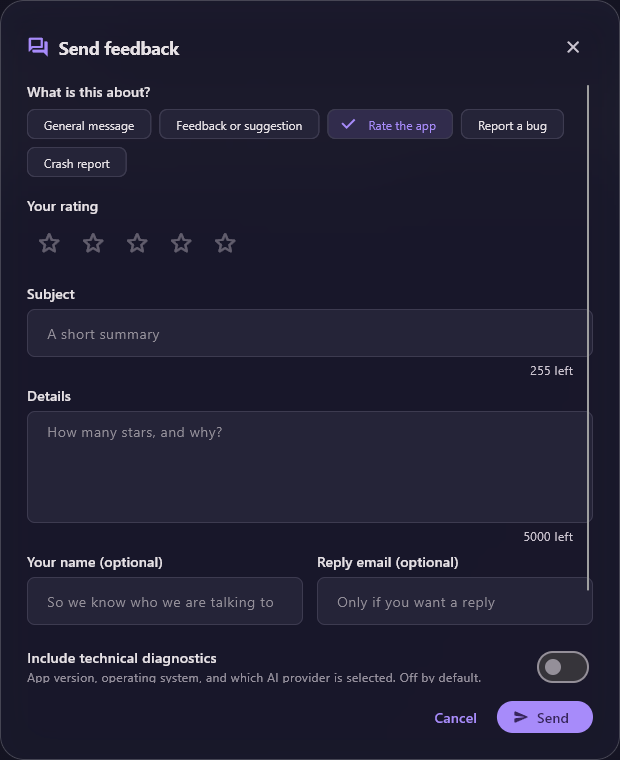
Pick Report a bug for something that does not work, and Crash report for a problem the app recorded; it is chosen for you when you come from a crash report. Whatever the type, every message includes the app version, the Windows version, your language setting and a random install identifier.
Technical diagnostics
Include technical diagnostics is off by default, and the app remembers your choice. Turn it on to add details that help trace a problem: the app version and build, the Windows version and processor type, language setting, theme, whether FFmpeg is present, the runtime version, the name of the active AI provider, how many providers have a key (a number only), the Local Enhancer engine version and the Whisper model name.
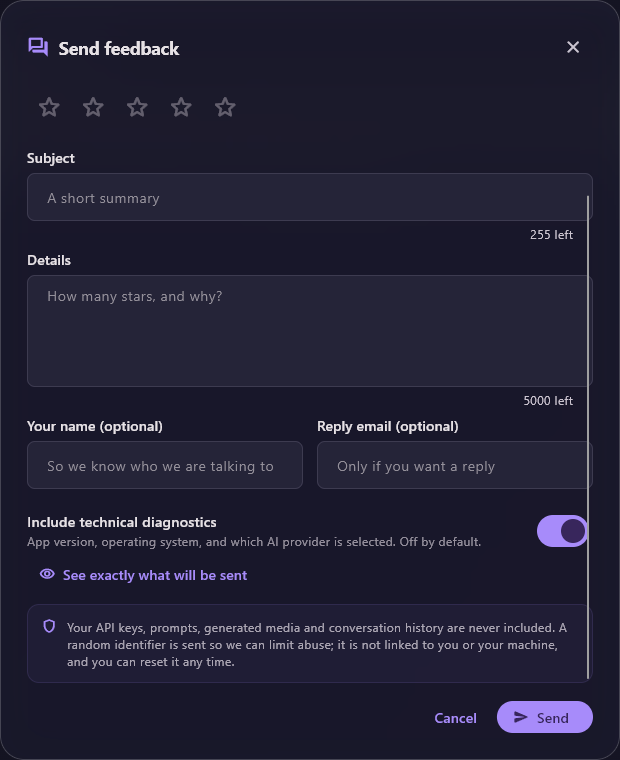
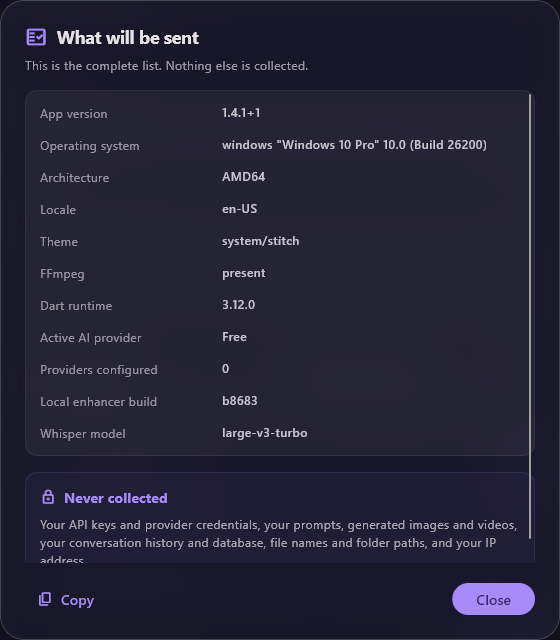
Click See exactly what will be sent to check the full list before sending; Copy copies it and Close returns to the form. The Never collected box names what is never included: API keys, prompts, generated images and videos, your conversation history, file names and folder paths. The form's note says the random identifier can be reset, but this version has no button for that.
Crash reports
If the app recorded a problem during an earlier session, a Something went wrong window appears shortly after the next start. It shows the error name, a short description and a reference. Nothing is sent unless you choose to send it.
| Item | What it does |
|---|---|
| Copy details | Copies the report text to the clipboard, then asks again. |
| Review details | Opens Report details, exactly what would be sent, with Copy and Close; then asks again. |
| Not now | Sets the report aside, and it is not offered again. If the same problem happens again within 7 days, it is not offered either. |
| Send on next start | Marks the report to be sent later. In the current version it is not actually sent by itself afterwards, so use Send if you want the report to reach the developer. |
| Send | Opens Send feedback filled in as a Crash report with a subject. Add what you were doing if you like, then press Send there. |
Before you see the report, your Windows user name has been removed from folder paths, web addresses are cut down to the site name, and account and computer names, e-mail and IP addresses and anything that looks like a key have been removed. No prompts, images or API keys are included. Reports stay in the Documents\ai_prompt_assistant folder, and old ones are cleared automatically.
Updates
Once per start, shortly after the app opens, it checks whether a newer version exists. If you are offline, the check quietly does nothing.
- When a newer version is out, an Update Available window shows your version, the new version and What's new:.
- Click Download to open the download page, pixeoai.com/apa, in your browser, and get the new installer there. Nothing downloads or installs inside the app. Later closes the window until the next start.
- Close the app and run the new installer over the old one, as in Install. Your chats, settings and keys in Documents\ai_prompt_assistant stay where they are. If an Old backend folder found window then appears, the app has found a leftover wan2gp_backend folder from an older version next to the program: Delete removes it to free disk space, and Ignore leaves it, so the window comes back at the next start.
The app checks only at start. To look for yourself at any time, open App Page in About or Website at the bottom of the sidebar.
Your version is shown at the bottom of the sidebar (for example v1.4.1) and in About.
About
Click About at the bottom of the navigation pane to see the app's name, version and build, and a short description. Three links sit below:
| Item | What it does |
|---|---|
| App Page | Opens the app's product page, pixeoai.com/apa, in your browser. New versions are published there. |
| More Free Apps | Opens pixeoai.com, where PixeoAi's other free apps are listed. |
| Contact Us | Opens a new e-mail to info@pixeoai.com in your mail app. |
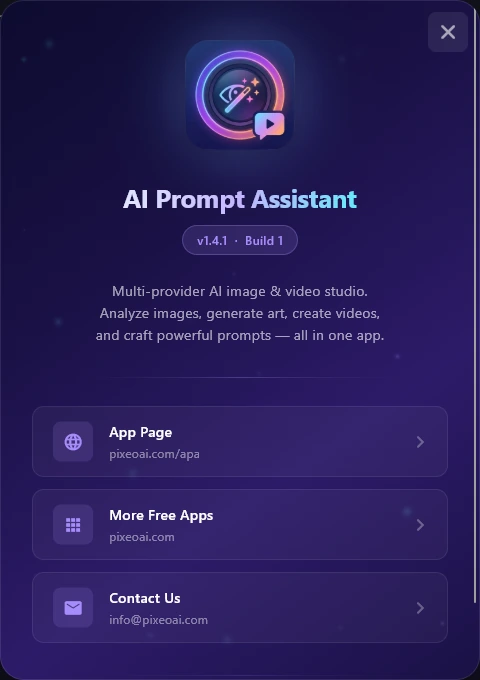
Troubleshooting
Find what you see in the left column. Most problems come from the provider or model chosen in the sidebar, so check those first.
| What you see | Why | What to do |
|---|---|---|
| The message "Please select at least one model" | No model is ticked for the current provider. A fresh install starts with none selected. | In the sidebar, click Fetch Models under Select Model(s), then click at least one model. See Choosing a model. |
| The model list is empty | The list has not been fetched yet, or the app cannot reach the provider. For Ollama, LM Studio or KoboldCpp, the program is not running or has no model loaded. | Click Fetch Models. For a local provider, start its program (in LM Studio, also its local server) and fetch again, following the steps under Connection failed. See Local providers. |
| A provider shows "(set key)" and cannot be picked | That provider needs an API key and none is saved. | Add the key in API Settings: expand the card of that provider and click Get API Key to create a key on its website. Which features need a key? shows what each key unlocks. Or choose Free. |
| The Free provider is slow, busy or shows an error | Free relies on public third-party services, so availability varies, and some routes may ask for paid credits. | Wait and try again, or change Free Route (Pollinations is the default). For steady results use a keyed or local provider. See The Free provider. |
| Image-to-prompt or Bulk Analysis gives nonsense or errors | The selected model cannot read images, and the app does not check this before sending. | Choose a model that understands images; see Recommended models. On Free, the Free card suggests the Gemini or Pollinations route for images, but results are unreliable: the default route could not read images in our tests. |
| Attach Video is missing in Chat | Only Google and Local Enhancer can read videos, so the item appears only with them. | Switch the provider to Google (a key is required) or Local Enhancer. See Writing and sending a message. |
| Video Studio shows "No models found", or has no free option | Video Studio has no free provider. OmniRoute needs no key but lists only the models your own OmniRoute gateway offers, and none when it is not running. | Add a key for Google Veo, Vertex AI, OpenAI Sora, Together or OpenRouter in API Settings, or start your OmniRoute gateway. See Video Studio settings. |
| The SVG preview keeps spinning | Weaker models, including many on Free, often write SVG code that the preview cannot draw. | Choose a stronger model in the sidebar; the app itself suggests one such as Gemini 3 Pro. See SVG Studio. |
| Proactive Co-Creator shows an error | The Co-Creator asks the first selected model for a detailed, structured answer, and some models, including Free routes, cannot produce it. | Pick a stronger provider or model in the sidebar, or turn the Co-Creator off with its brain icon and chat normally. See Proactive Co-Creator. |
| Prompts shows "Smart search failed — using raw query." | Smart search needs a working AI provider and model, and gives up after about 20 seconds. | Ordinary search results are still shown. Check the sidebar provider and model, or turn smart search off with the sparkle button. See Search. |
| Prompt libraries do not update | You are offline, or the automatic update has already run: it updates only the selected library, once per session, and only when that library is more than a day old. | Go online and click Refresh or Refresh all. If a library looks wrong, use Library actions ▸ Rebuild library from scratch. See Library sources. |
| Old Image Studio sessions show missing pictures | Results live in the Windows temporary folder, and a clean-up has removed them. | Those pictures cannot be brought back. From now on, click Save on results you want to keep. See Where your files are kept. |
| The History panel is not visible | It appears only on Chat, Image Studio and Video Studio, and a narrow window shows a slim rail instead of the full panel. | Press CtrlH or click Show history, or maximise the window. See History. |
| The Local Enhancer will not download or start | Its models are large (2 to 17 GB), the first download needs the internet, and the engine it downloads is made for NVIDIA graphics cards. | Free up disk space, stay online for the first download, and use a PC with an NVIDIA graphics card. When Load Model appears, press Load and wait for Model Ready. See Local Enhancer. |
| Storyboard detection fails, or the Balanced download stalls | Detection needs FFmpeg, and Balanced downloads a shot-detection model the first time; both need the internet once. | Stay online for the first run. If the model cannot run, Balanced falls back to the Fast method by itself; offline, choose Fast. See Import a video. |
| An animated SVG will not play | Playing it inside the app needs the Microsoft WebView2 runtime, which is missing or failed to start. | Click Download WebView2, install it and restart the app, or use Play Animation in Browser. See SVG Studio. |
Use Send Feedback with Report a bug and turn on Include technical diagnostics, or click Contact Us in About to write to info@pixeoai.com.
Frequently asked questions
Is AI Prompt Assistant free?
Yes. The app is free, and the built-in Free provider lets you chat and make pictures without any key or account. If you connect a paid provider, you pay that provider directly under its own pricing. See Providers.
Which API key do I need?
None to start. A Google key (free tier available) is a good all-round choice: it covers chat with image and video attachments, Image Studio and Video Studio. Which features need a key? compares the options.
Can it work offline?
Partly. With a local provider such as the Local Enhancer, Ollama or LM Studio, chat and image-to-prompt work offline once set up, and many tools never need the internet. See What works offline.
Where are my files?
Chats, settings, templates and projects are in Documents\ai_prompt_assistant. Image and Video Studio results sit in the Windows temporary folder until you press Save. Details in Where your files are kept.
Is my API key safe?
Your keys stay on this computer, in the settings kept in Documents\ai_prompt_assistant; there is no account or cloud copy. They are hidden on screen but not encrypted in that folder, so protect your Windows account and do not share the folder. Each key is sent only to its own provider and is removed from feedback and crash reports.
Can I use my own local models?
Yes. The app works with Ollama, LM Studio and KoboldCpp, its own Local Enhancer, OmniRoute, and any compatible server you add as a custom provider. See Local providers.
Why is the app in English only?
The app's interface is available in English only for now, which is why the Arabic edition of this manual names every button by its English label. You can still write prompts in your own language; how well the answer follows depends on the model.
Can it make videos without a key?
Not with a free service: Video Studio needs a key for Google Veo, Vertex AI, OpenAI Sora, Together or OpenRouter, or your own OmniRoute gateway. You can still write video prompts for free in Chat and Prompt Director and use them elsewhere.
How do I move to a new PC?
Install the app on the new PC, close it on both computers, and copy the Documents\ai_prompt_assistant folder into Documents on the new one. That folder holds your API keys, so keep the copy safe. Save Image and Video Studio results first, and download local models again. Storyboards also need their original video files at the same place, and if your Windows user name differs on the new PC, pictures attached in old chats and storyboard frames may not show.
What is the difference between the two delete buttons?
Delete Temporary Files removes only the copies of attached images and videos; your chats stay. Delete All Data removes all chats and studio sessions but keeps settings and API keys. The table in Delete data lists everything.
Does the app send data anywhere?
Your prompts go only to the provider you choose. The app also checks for updates and downloads libraries and models, and it sends feedback only when you press Send. See What goes online.
How do I update the app?
When Update Available appears, click Download, get the new installer from the page that opens and run it over the old version; your data stays. See Updates.
Ready to create?
Download AI Prompt Assistant for free, start on the Free provider, and come back to this manual whenever you need it: every chapter is one click away in the contents.